

Follow us on Instagram for more fun ideas for kids!
By using this site, you agree to our Terms of Use. This post may contain affiliate links. Read our disclosure policy. As an Amazon Influencer, I earn from qualifying purchases.
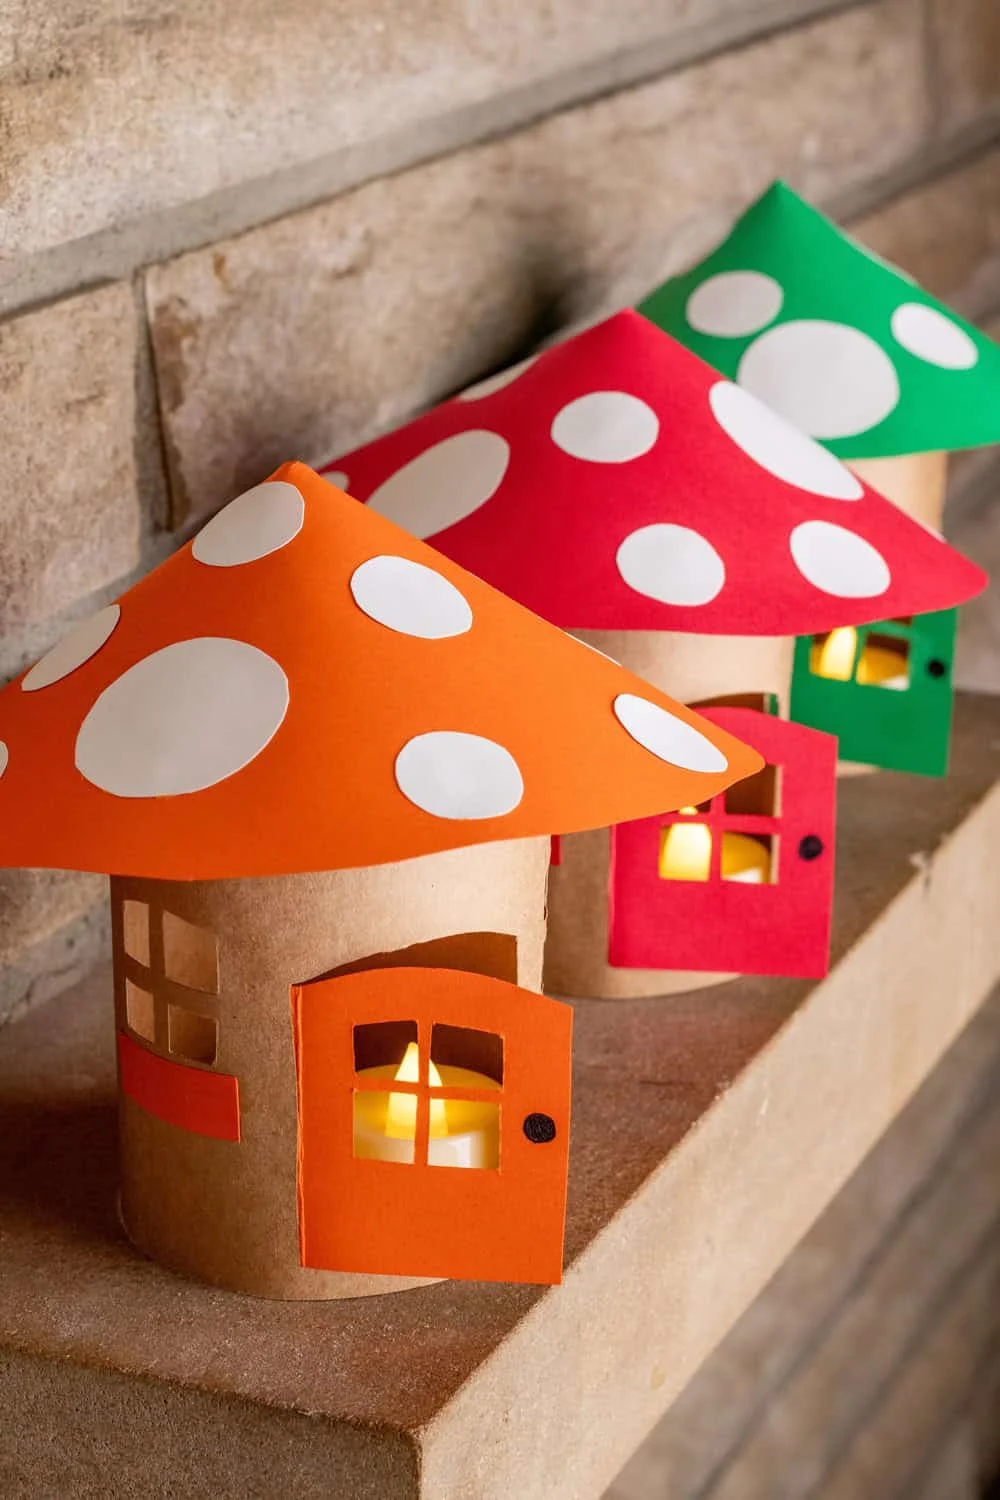
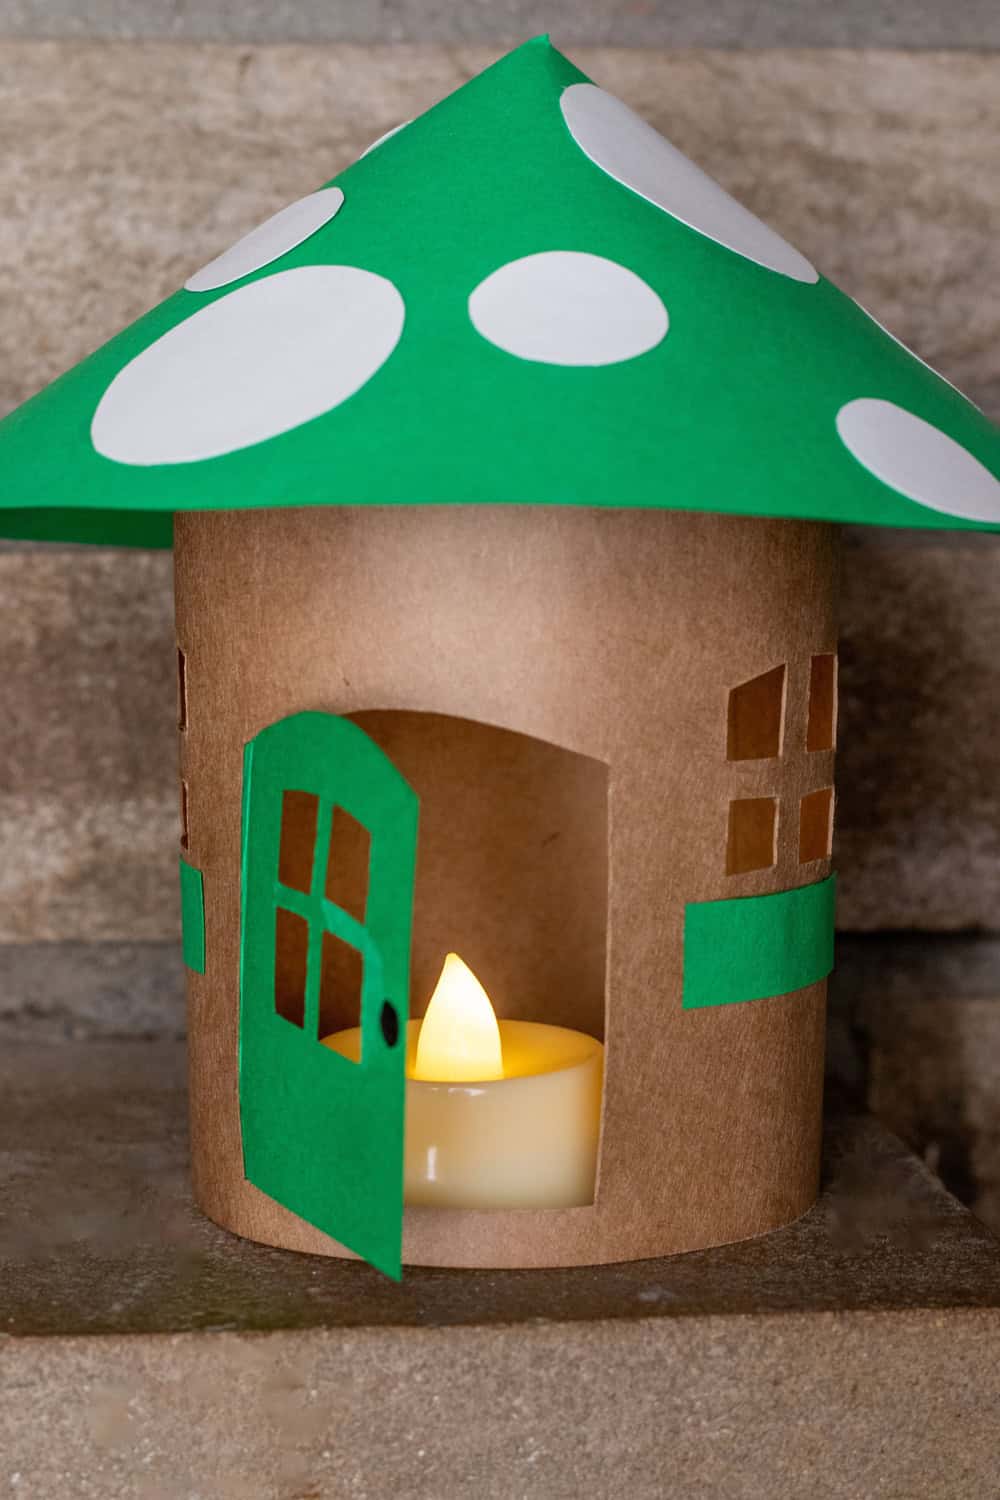
With just some colored paper and imagination you can create magical toadstool fairy houses and add lights inside to turn into lanterns!
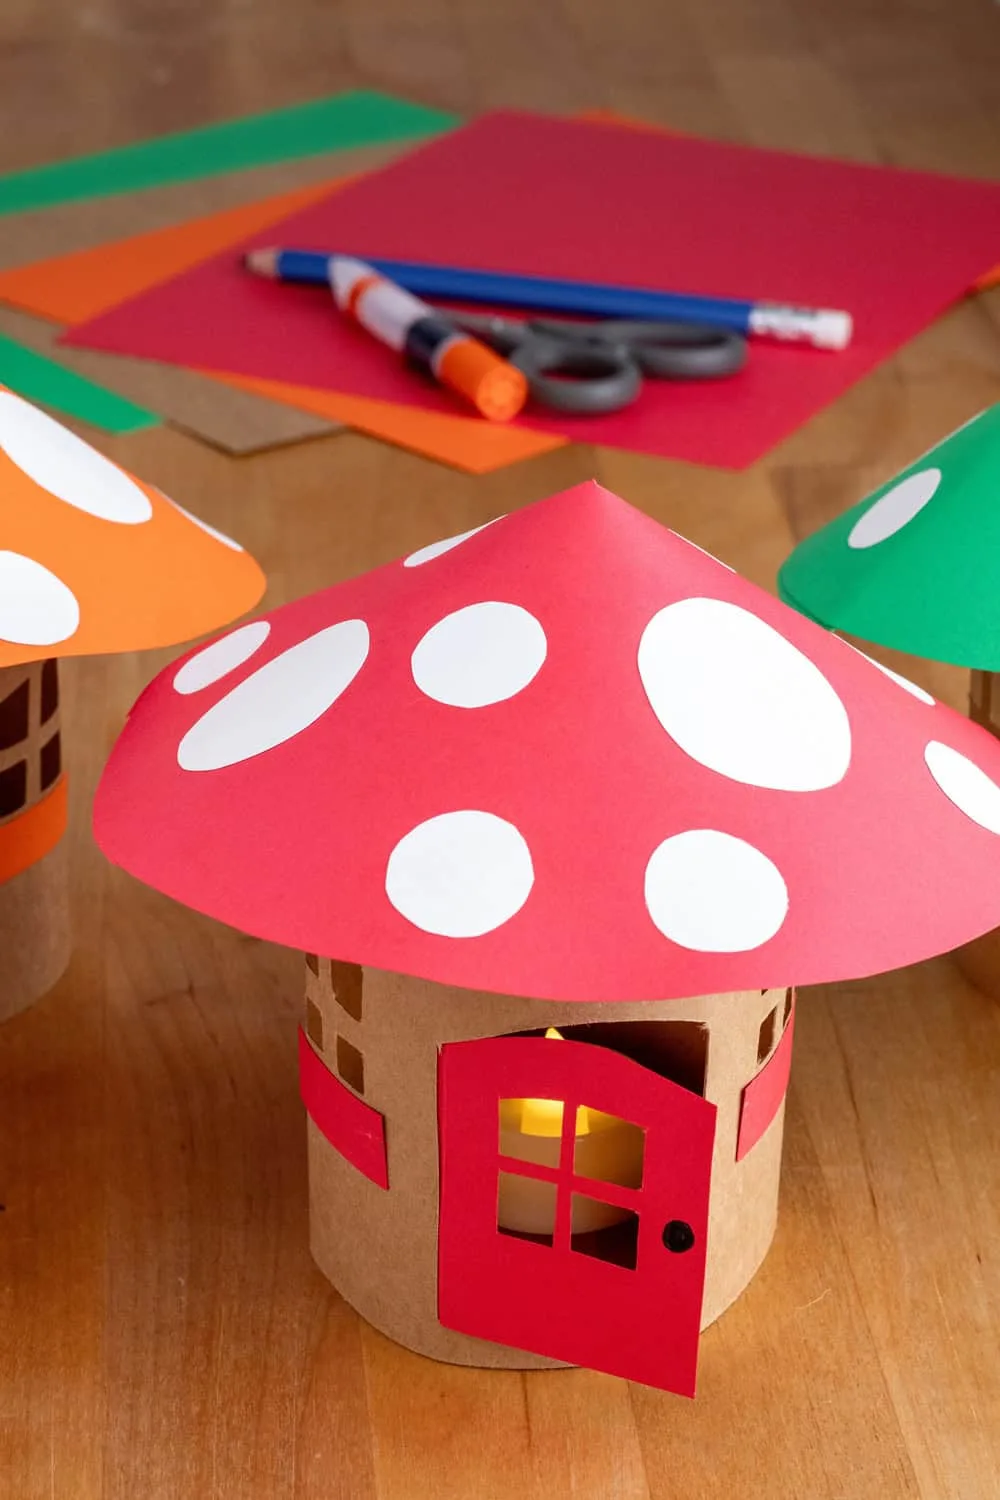
Transform your space into a whimsical woodland wonderland with these toadstool fairy house lanterns! Using construction paper, glue, and flameless candles, you can create enchanting little homes for fairies that illuminate your surroundings with a soft, warm glow.
This delightful fairy DIY adds a magical touch to any room and serves as a perfect fall craft for kids of all ages.

DIY Toadstool Fairy House
- Kraft cardstock/construction paper
- Colored cardstock/construction paper of choice
- White paper
- Flameless votive candles
- Glue
- Scissors


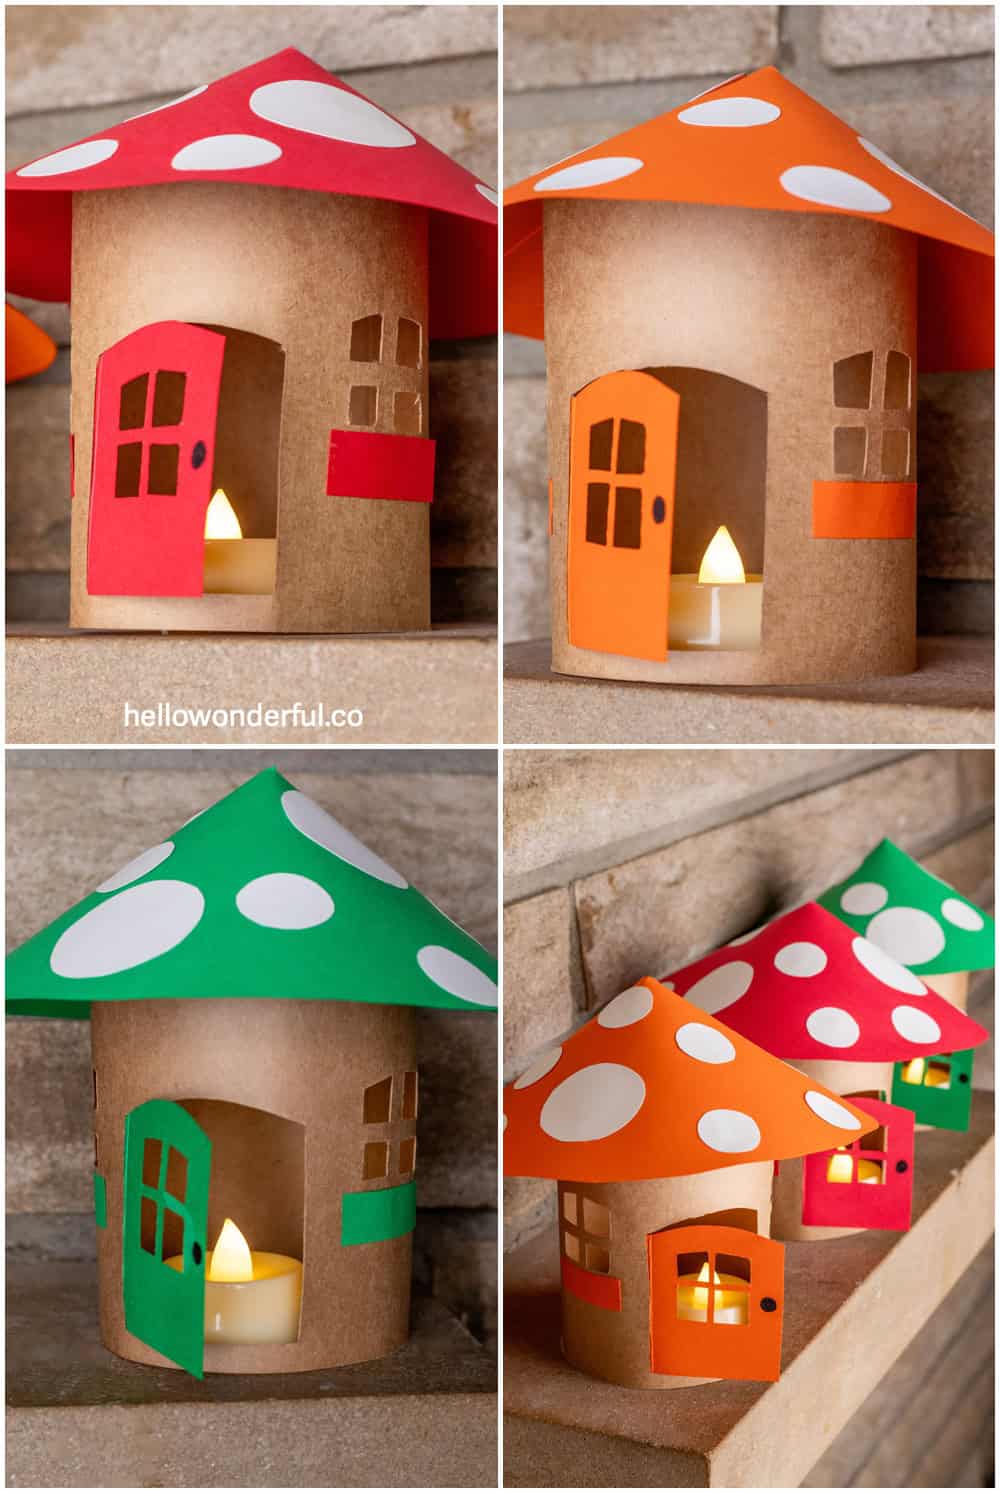
How to make Toadstool Fairy Lanterns
Step 1: Begin the Base
Start by cutting one piece of the kraft cardstock in half (the long way; hotdog style!). Take one half and sketch out where you want the windows and door to be. Using scissors or an X-acto knife, cut out the windows and the door.
Step 2: Start the Roof
Take one piece of the colored cardstock and cut out an 8-inch circle. I used an 8 inch round cake pan as a stencil for this! Make sure to line it up so you’re cutting the circle from closer to one side of the colored paper, because we’ll be using the rest for another step. Once the circle is cut out, cut a slit from one side to the center of the circle.
Step 3: Create the Roof
Cut out circles of various sizes from the white paper. Grab your colored paper circle and overlap the two sides of the slit to create the cone shape for the roof, then lightly mark where the top piece sits. Lay the circle back down, and glue the white circles onto the colored circle, avoiding the part of the circle that will be covered with the overlap from the slit.
Once dry, overlap the two sides of the slit again and glue together to create the cone shaped toadstool roof.
Step 4: Door and Details
Going back to the colored paper you used for the roof, fold one edge about ⅓ inch over. Place the piece of kraft paper you cut to create the door hole directly next to the fold, and use it as a stencil to create the correct size of door. Use a black pen or marker to draw a little circle door knob on the door. Cut out the door, then cut two rectangles slightly wider than the windows to make the planter boxes.
Step 5: Assemble the Base
Use a bit of glue to attach the planter boxes beneath the windows. Then glue the door so the flap is tucked to the inside of the house and creates a hinge. Roll the entire base of the house into a cylinder so that the correct side is facing outwards, and glue the edges together.
Step 6: Put the Roof On
Cut the piece of kraft paper from the door into three pieces, folding each piece in half. Glue each piece to the inside of the top of the base, so they’re all pointed inwards. Add glue to these pieces, and use them to secure the roof onto the base of the house.
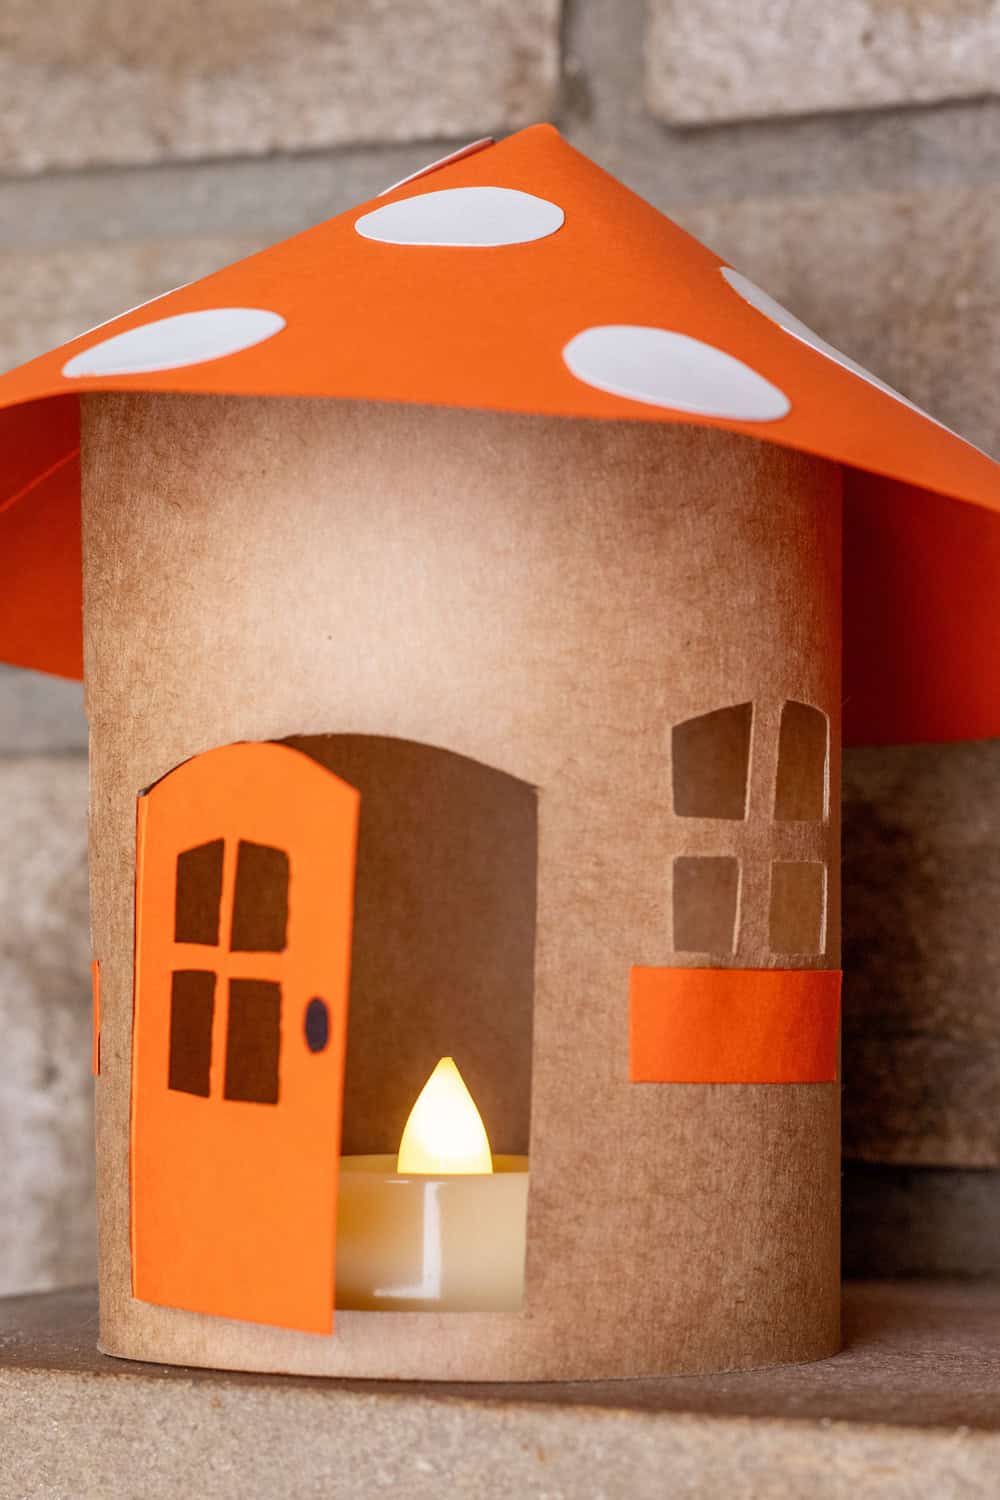
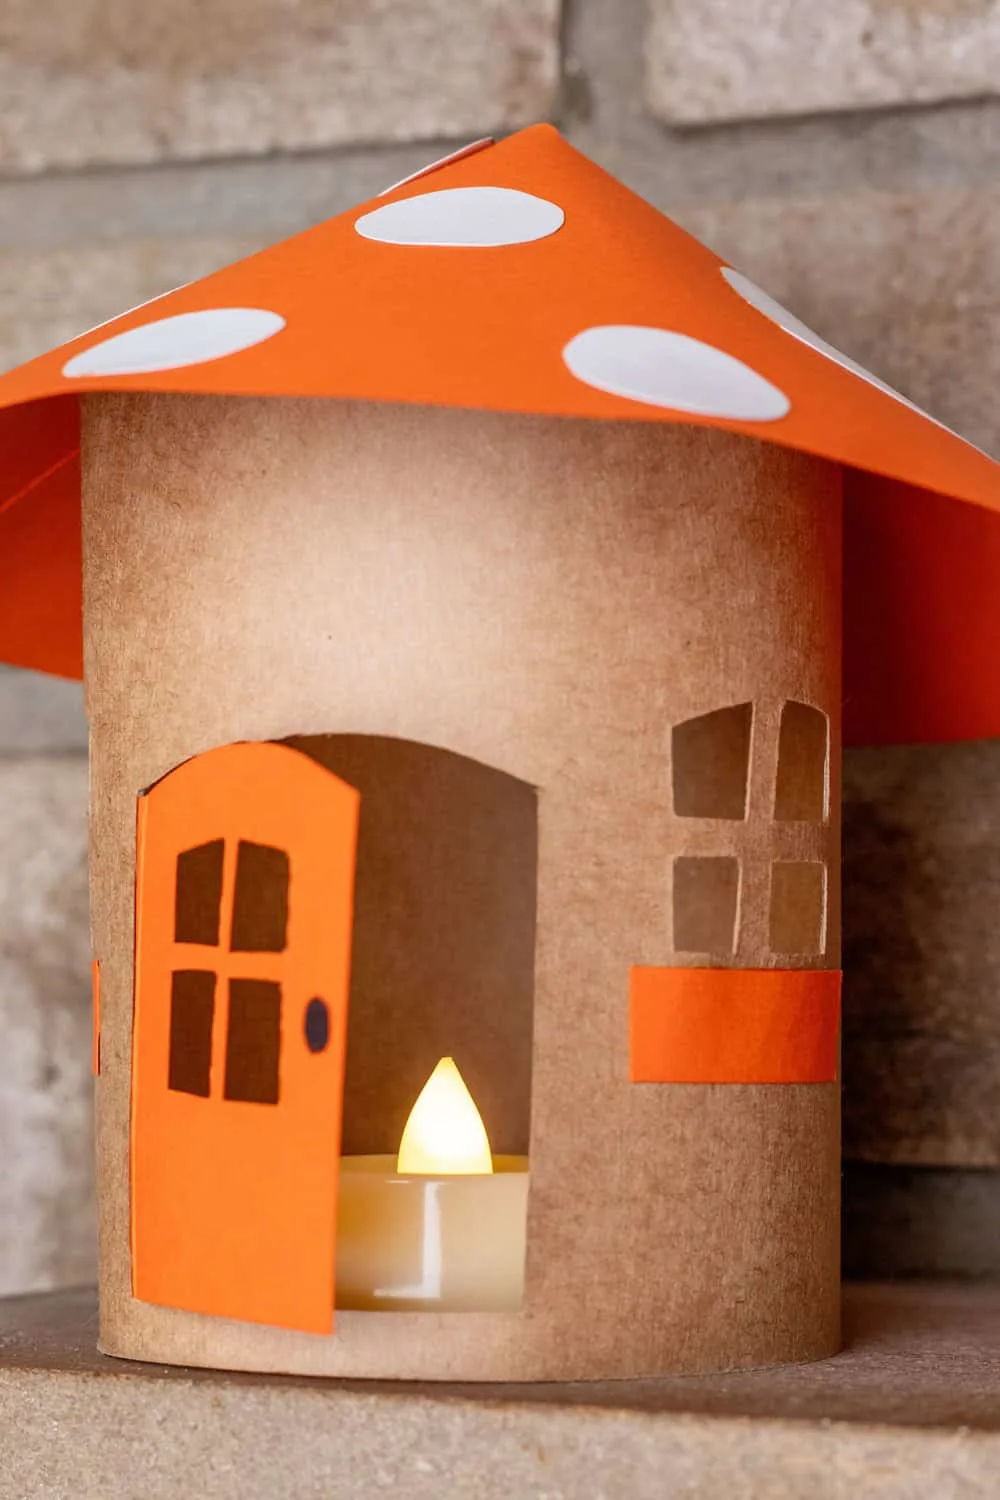
Step 7: Light it Up!
Place a flameless candle inside of your toadstool fairy house and enjoy the cozy aesthetic.

Final Thoughts
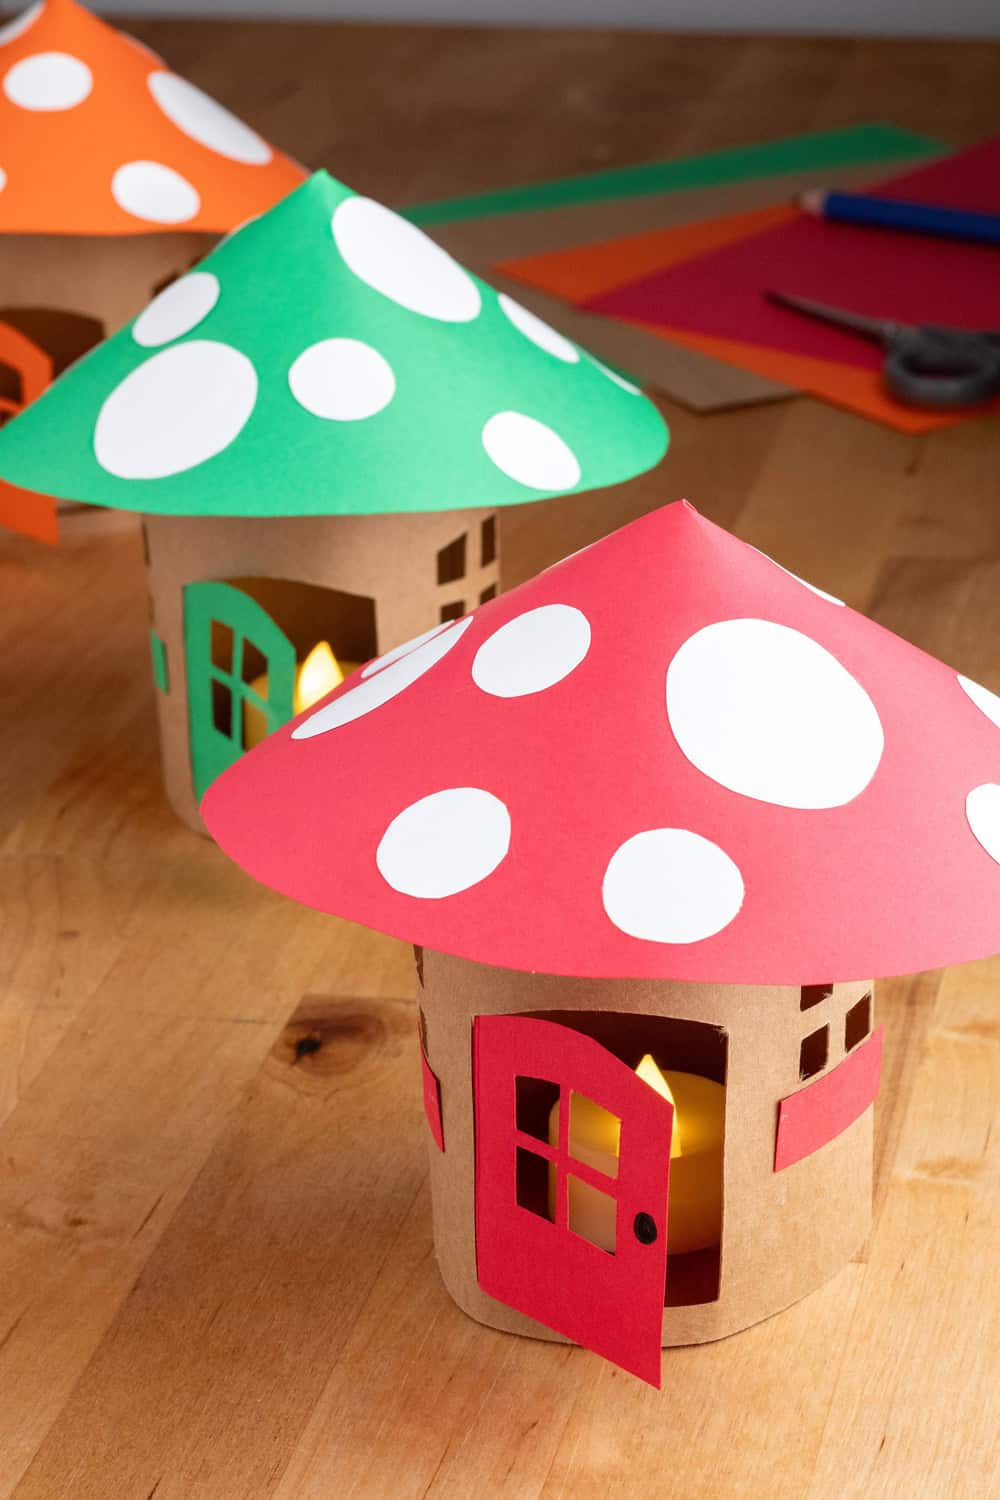
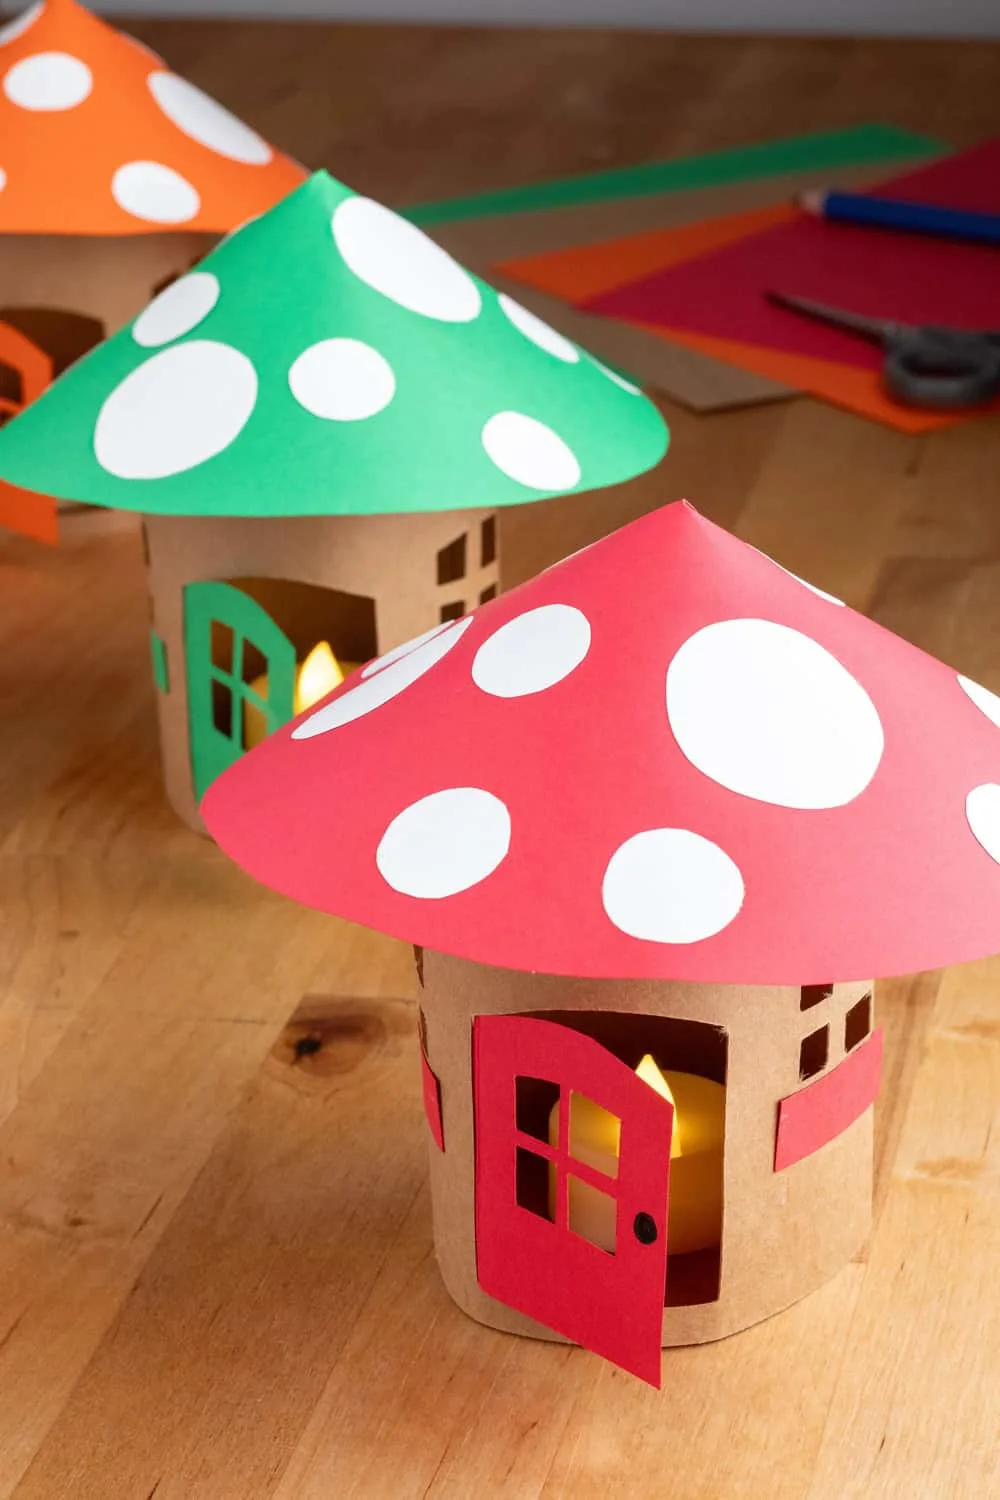
By combining the simplicity of construction paper with the fun illumination of candles, you craft a charming piece of fall decor! It’s also an adorable fall craft to make with your kids they will love making lanterns that glow! As you admire your completed toadstool fairy houses, you’ll find that these little lanterns do more than light up a room—they create a magical feeling that inspires old time wonder.
Magical Toadstool Fairy House Craft


Materials
- Kraft cardstock/construction paper
- Colored cardstock/construction paper of choice
- White paper
- Flameless votive candles
- Glue
- Scissors
Instructions
Step 1: Begin the Base
- Start by cutting one piece of the kraft cardstock in half (the long way; hotdog style!). Take one half and sketch out where you want the windows and door to be. Using scissors or an X-acto knife, cut out the windows and the door.
Step 2: Start the Roof
- Take one piece of the colored cardstock and cut out an 8-inch circle. I used an 8 inch round cake pan as a stencil for this! Make sure to line it up so you’re cutting the circle from closer to one side of the colored paper, because we’ll be using the rest for another step. Once the circle is cut out, cut a slit from one side to the center of the circle.
Step 3: Create the Roof
- Cut out circles of various sizes from the white paper. Grab your colored paper circle and overlap the two sides of the slit to create the cone shape for the roof, then lightly mark where the top piece sits. Lay the circle back down, and glue the white circles onto the colored circle, avoiding the part of the circle that will be covered with the overlap from the slit.
- Once dry, overlap the two sides of the slit again and glue together to create the cone shaped toadstool roof.
Step 4: Door and Details
- Going back to the colored paper you used for the roof, fold one edge about ⅓ inch over. Place the piece of kraft paper you cut to create the door hole directly next to the fold, and use it as a stencil to create the correct size of door. Use a black pen or marker to draw a little circle door knob on the door. Cut out the door, then cut two rectangles slightly wider than the windows to make the planter boxes.
Step 5: Assemble the Base
- Use a bit of glue to attach the planter boxes beneath the windows. Then glue the door so the flap is tucked to the inside of the house and creates a hinge. Roll the entire base of the house into a cylinder so that the correct side is facing outwards, and glue the edges together.
Step 6: Put the Roof On
- Cut the piece of kraft paper from the door into three pieces, folding each piece in half. Glue each piece to the inside of the top of the base, so they’re all pointed inwards. Add glue to these pieces, and use them to secure the roof onto the base of the house.
Step 7: Light it Up!
- Place a flameless candle inside of your toadstool fairy house and enjoy the cozy aesthetic.


Agnes Hsu is a mom of three and has been inspiring parents and kids to get creative with easy activities and family friendly recipes for over 10 years. She shares her love for creative play and kids food to her 2MM+ followers online. Agnes' commitment to playful learning and kindness has not only raised funds for charity but also earned features in prestigious nationwide publications.