


Follow us on Instagram for more fun ideas for kids!
By using this site, you agree to our Terms of Use. This post may contain affiliate links. Read our disclosure policy. As an Amazon Influencer, I earn from qualifying purchases.
Using simple items like white glue, shaving cream and food coloring, you can make your own rainbow puffy paints in minutes for a fun sensory art project!
Kids love touching what they paint which is why puffy paint is so fun to make! Did you know you could make your own rainbow puffy paint using just shaving cream, glue and food coloring? Puffy paint allows the kids to enjoy a hands-on art project that’s both exciting and visually stunning.
Whether you’re looking to add texture to your paintings or seeking a fun activity for sensory play, making your own puffy paint is a fantastic exploration of colors. Read more below to see how easy it is to DIY your own paints.

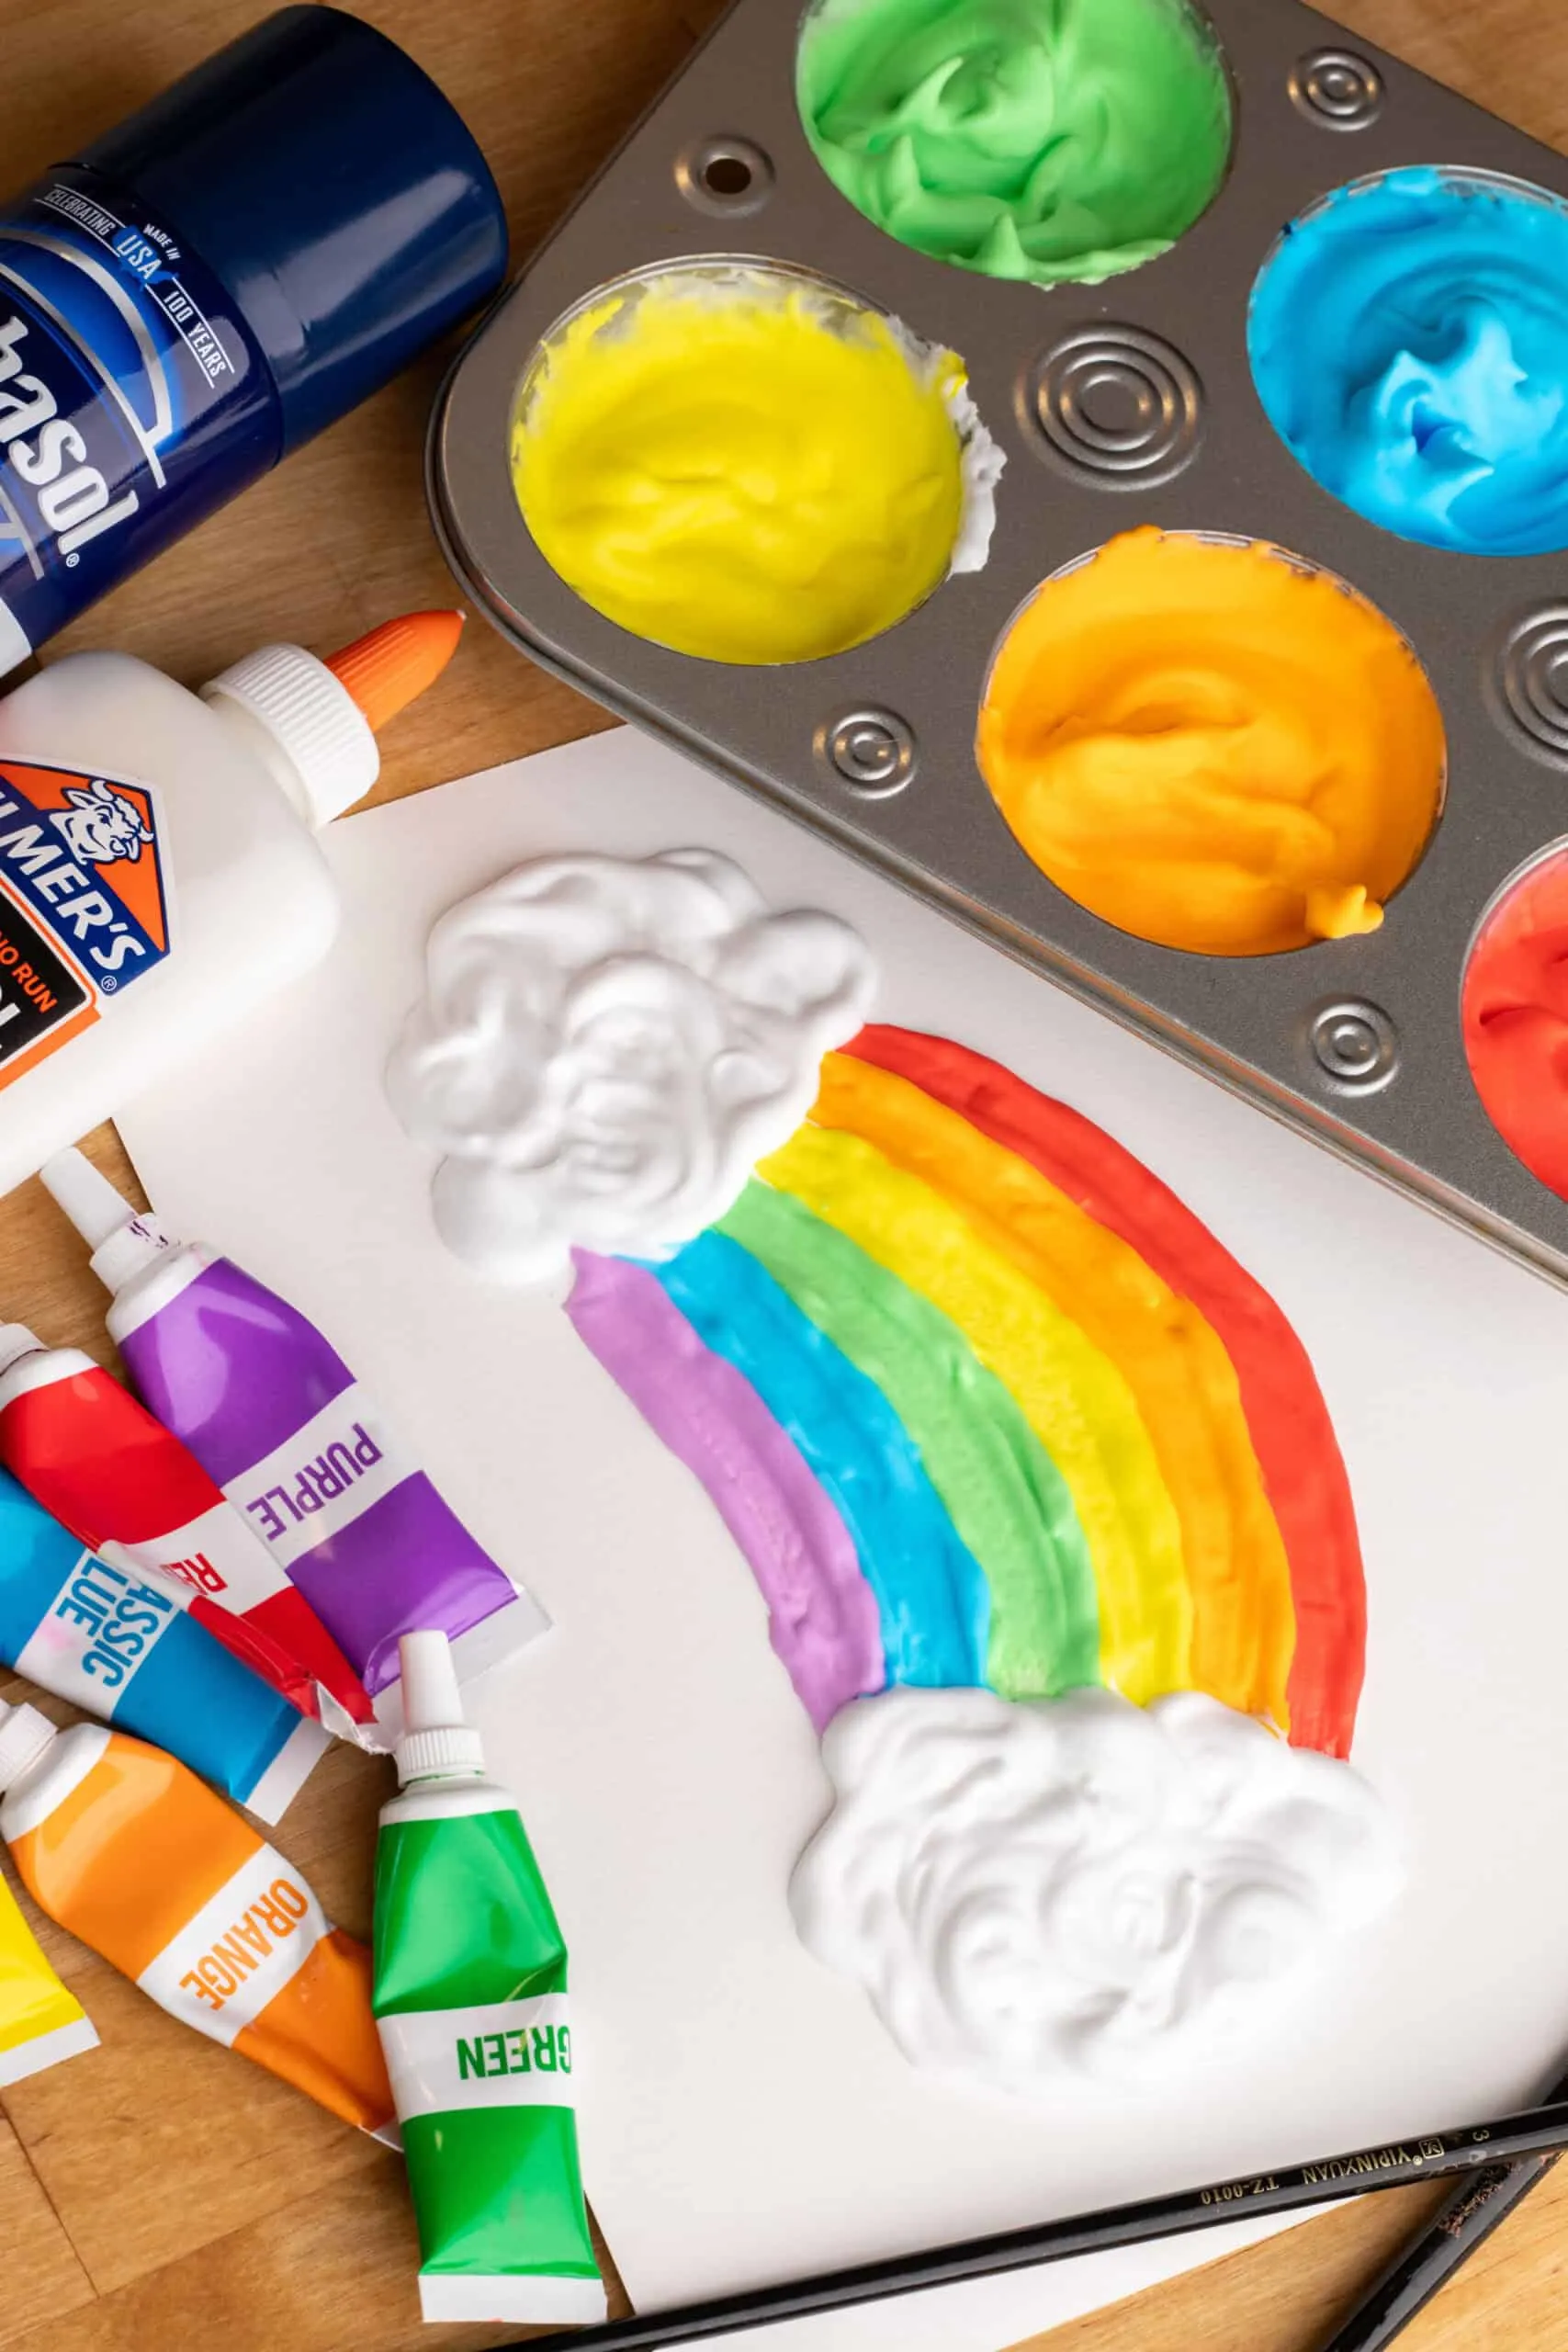
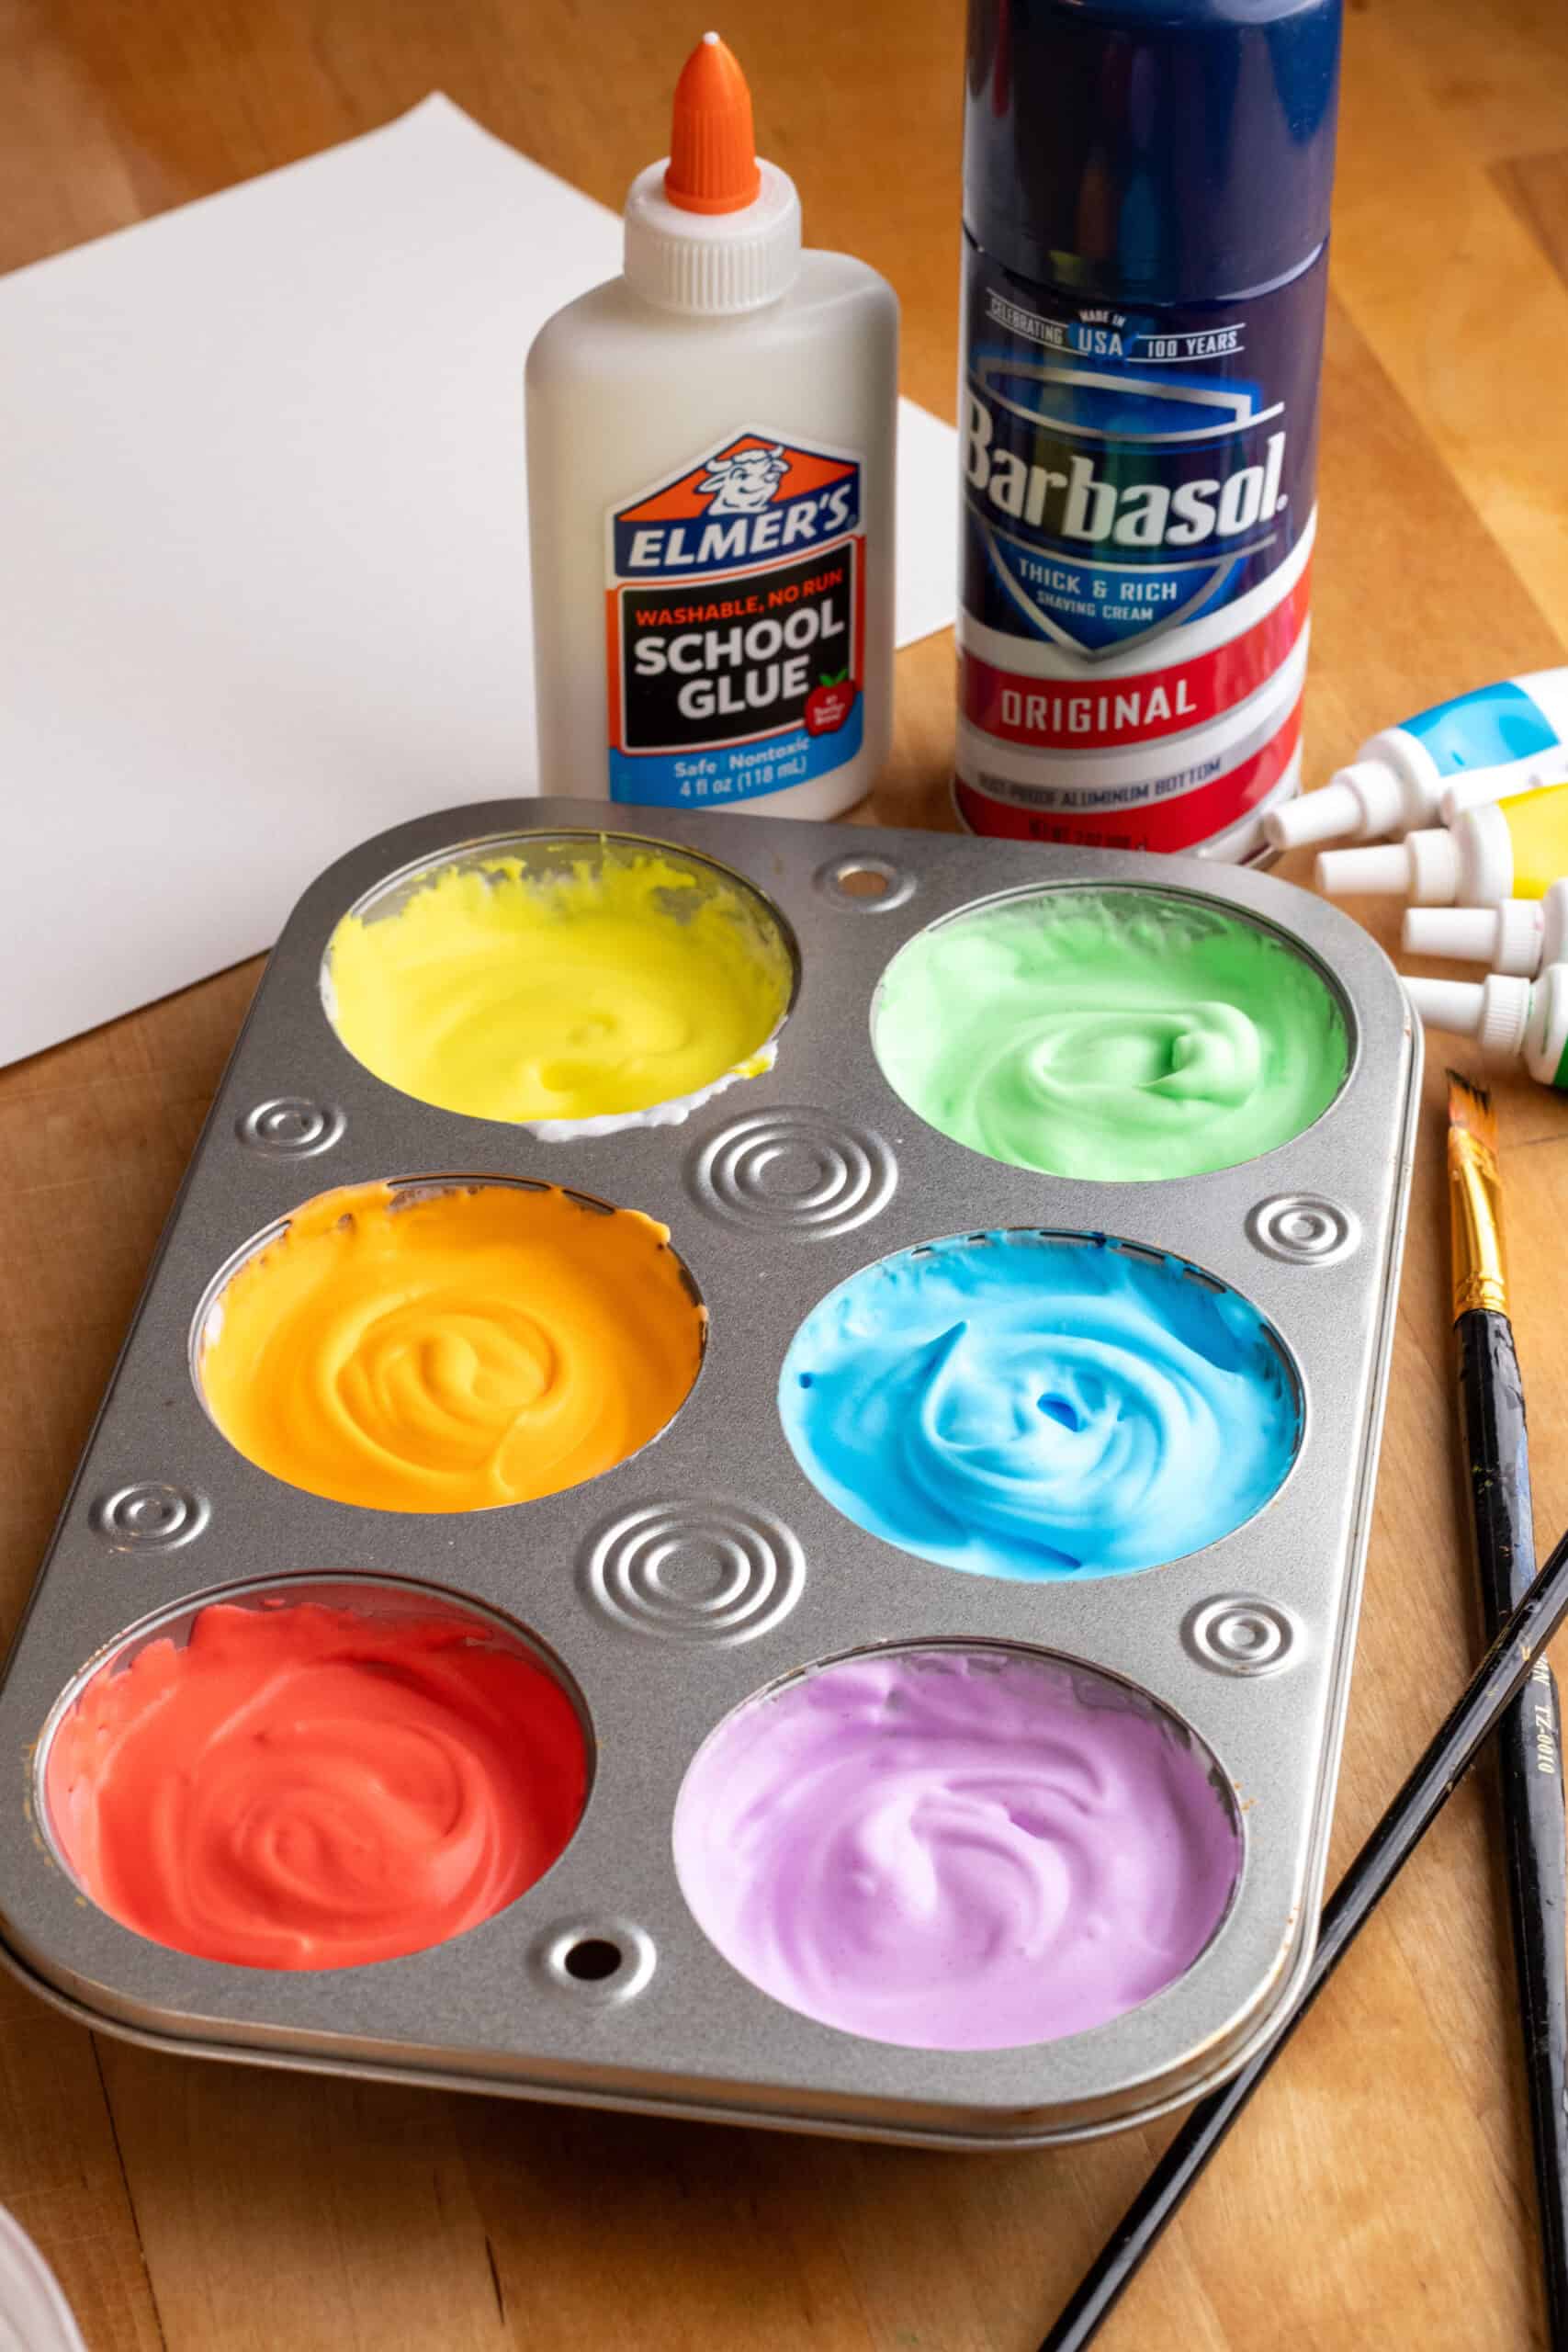
DIY Puffy Paint – Materials:
- Shaving cream (the foamy kind, not gel)
- White school glue like Elmers
- Food coloring (assorted colors) (the gel kind is best for vibrant colors)
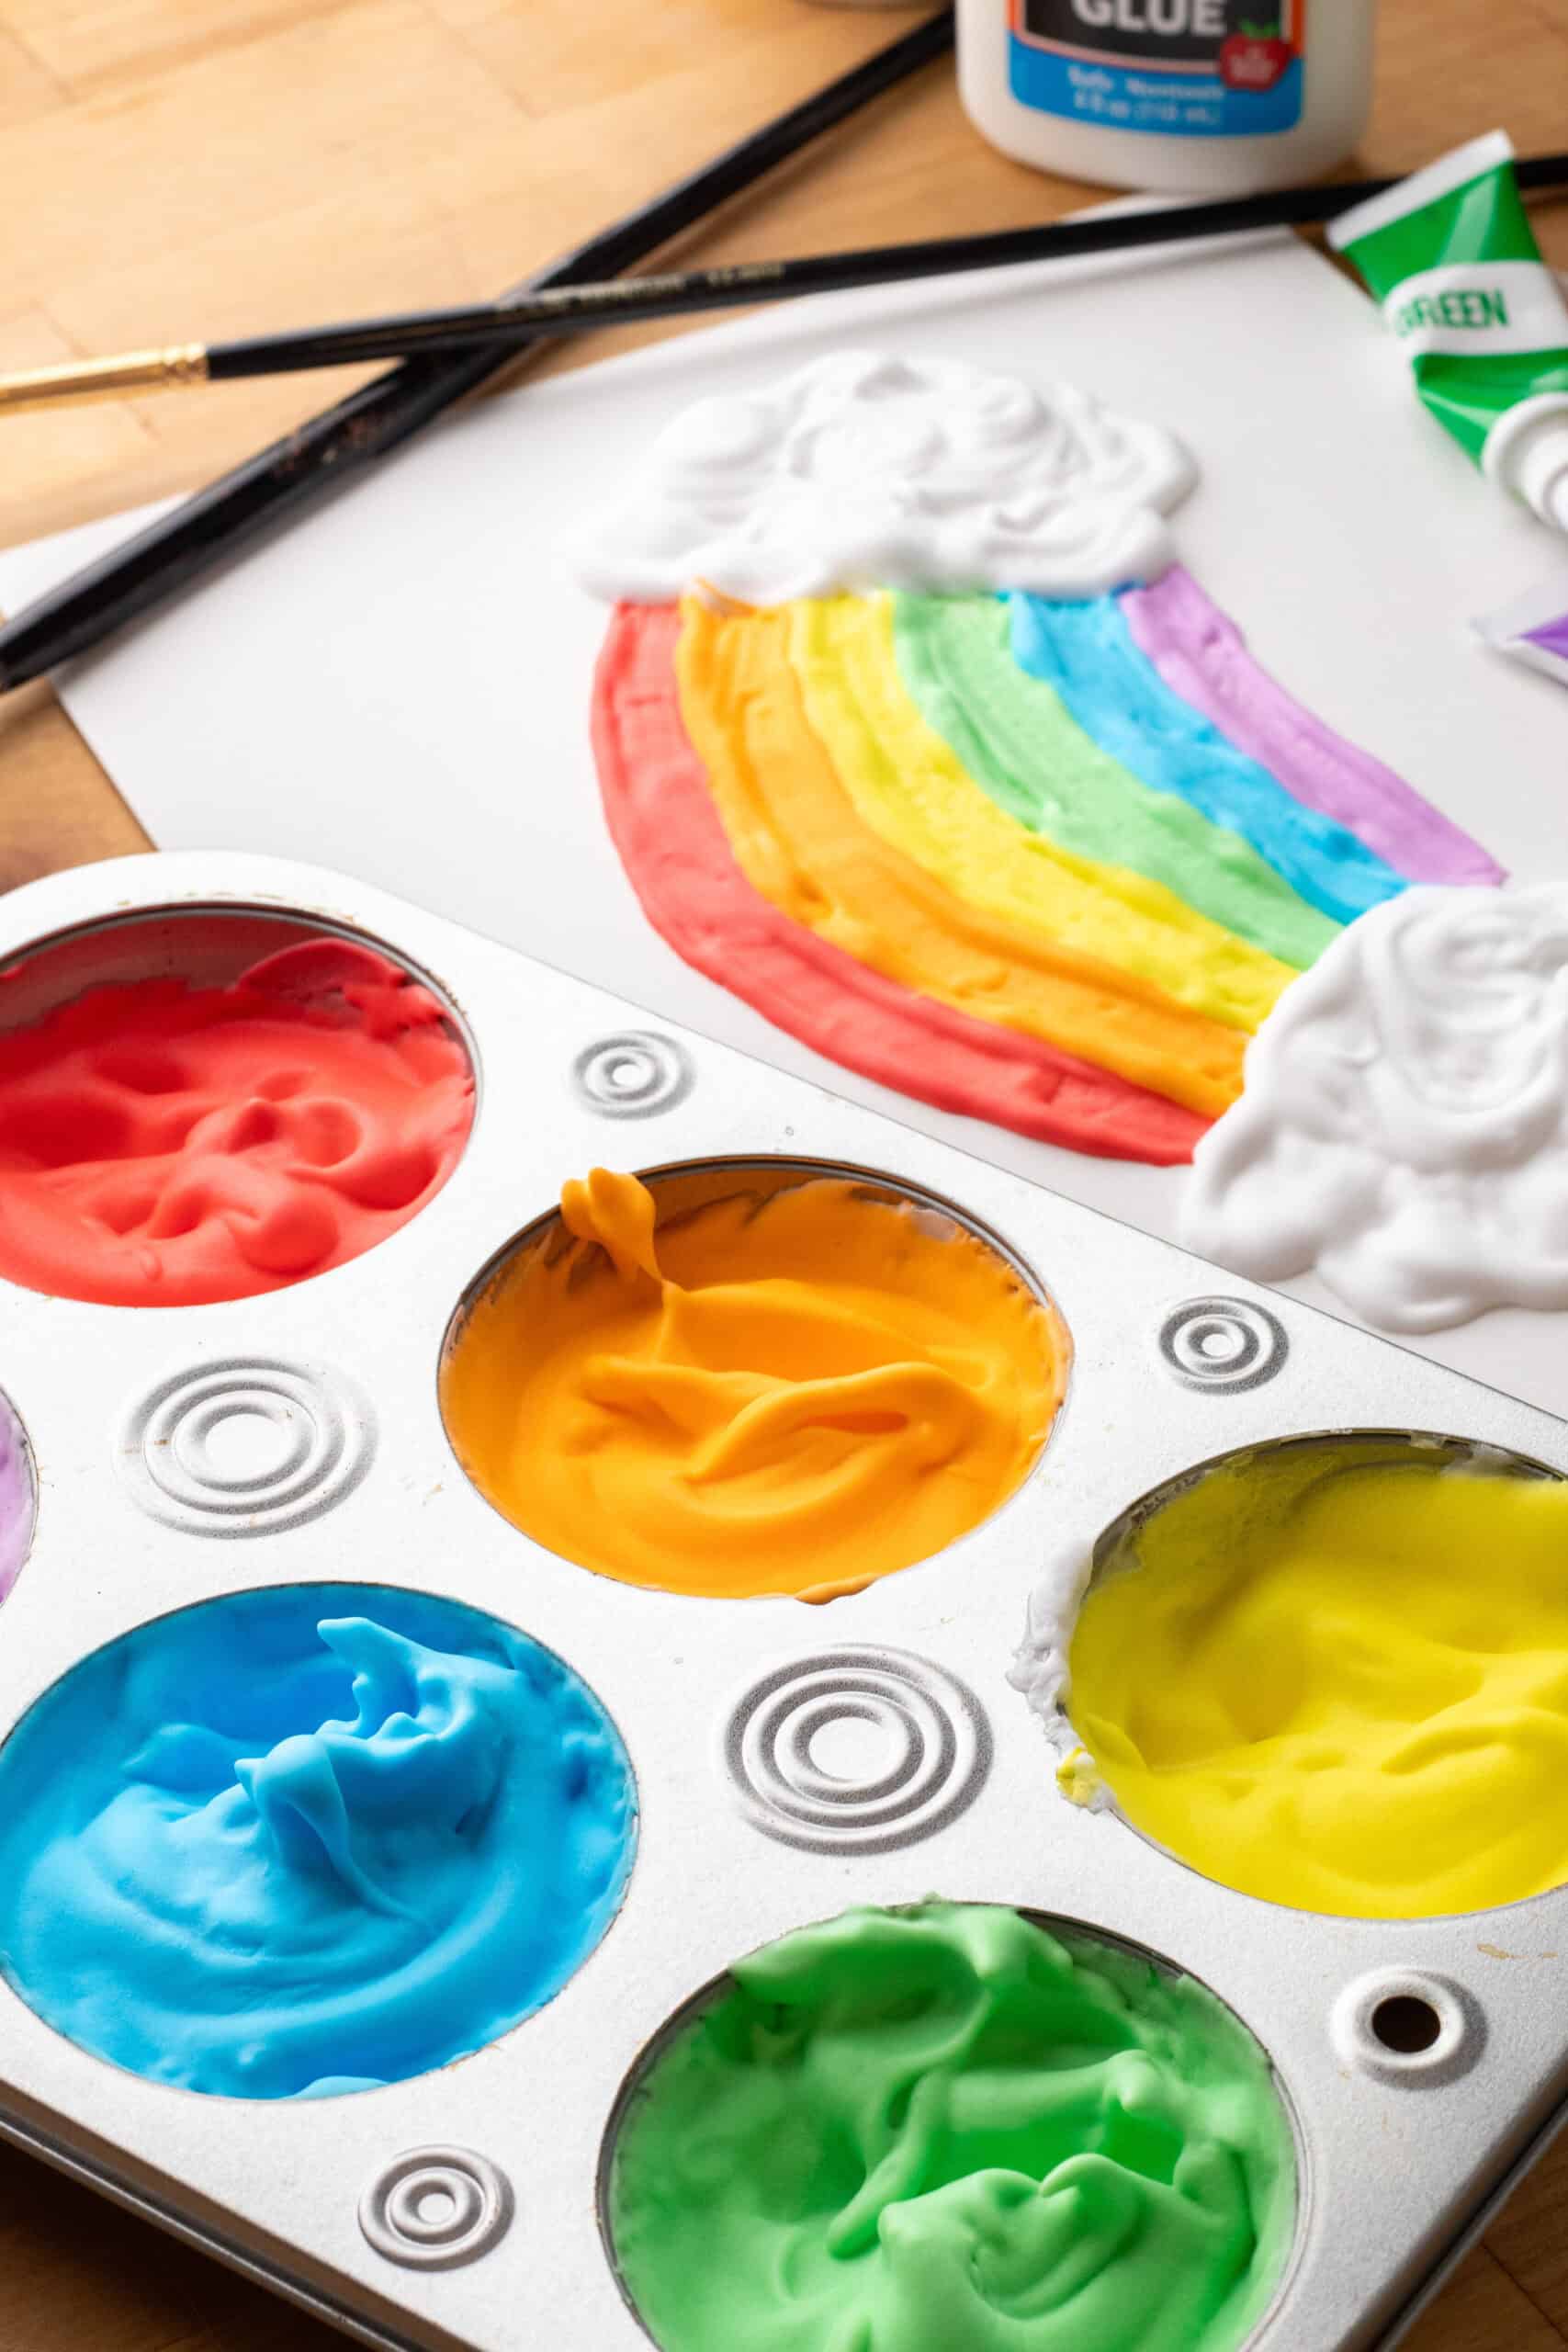
- 6 containers (a muffin tin works well!)
- Paintbrushes
- Mixing spoons/sticks
- Paper or cardboard for painting

How to make Rainbow Puffy Paint
Step 1: Make the Base
Add equal parts shaving cream and Elmer’s school glue to each compartment of your muffin tin. This becomes the base of the puffy paint!
Step 2: Add Some Color
Mix in a few drops of food coloring to each compartment of the muffin tin. Stir the food coloring into the mixture until the color is evenly distributed and reaches your desired intensity.
Step 3: Create Your Masterpiece
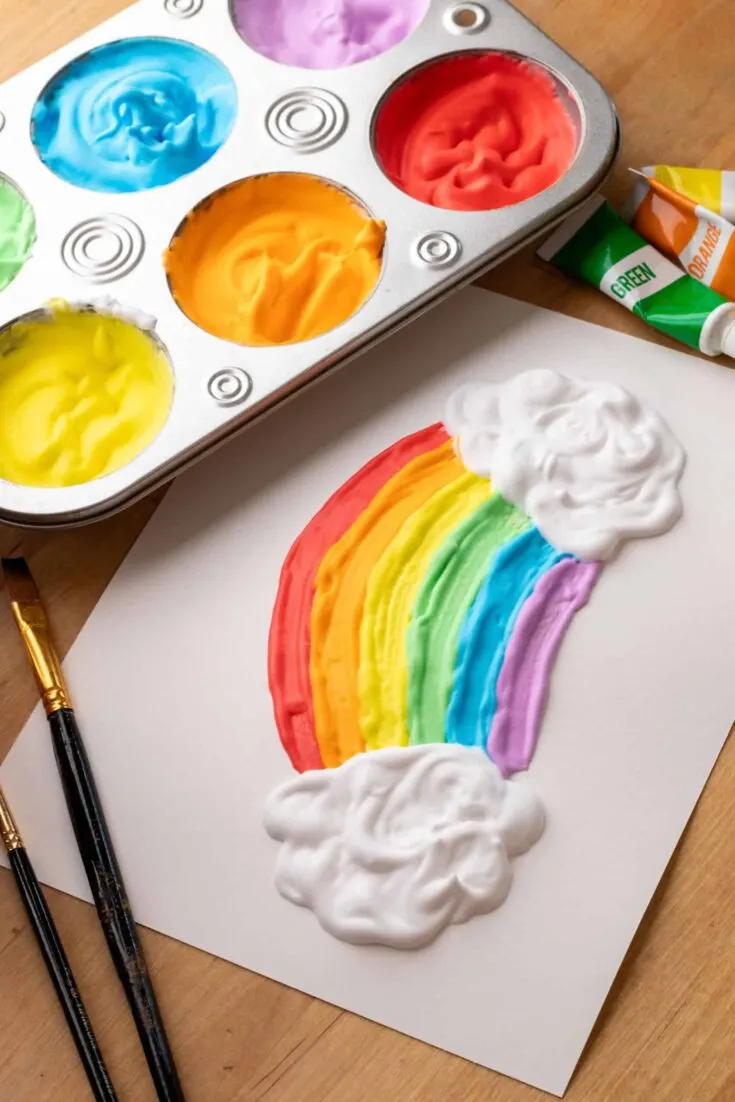
Now comes the fun part—painting! Use paintbrushes or small spatulas to apply your homemade puffy paint onto paper or cardboard. Experiment with different strokes and techniques to create texture and depth in your artwork. The puffy paint will deflate slightly as it dries, but will still leave a three-dimensional look to your creations.
Step 4: Let It Dry
Allow your artwork to dry completely. The drying time will depend on how thickly you applied the puffy paint and the humidity in your environment. Be patient—the texture and vibrant colors will become more pronounced as it dries.
Step 5: Enjoy Your Artwork
Once your puffy paint artwork is dry, display it proudly! These textured paintings are perfect for framing and hanging on the wall, giving your space a splash of color and creativity. You can also use them to create greeting cards, decorate notebooks, or as personalized gifts for friends and family.

Final Thoughts
Making homemade puffy paint with shaving cream, Elmer’s school glue, and food coloring is not only a fun art project but also a great way to explore textures and colors. Whether you’re crafting with kids, hosting a creative party, or simply enjoying some solo art time, this DIY activity is sure to spark joy and inspire your inner artist.
How To Make Rainbow Puffy Paint

Materials
- Shaving cream (the foamy kind, not gel)
- White school glue like Elmers
- Food coloring (assorted colors) (the gel kind is best for vibrant colors)
- 6 containers (a muffin tin works well!)
- Paintbrushes
- Mixing spoons/sticks
- Paper or cardboard for painting
Instructions
Step 1: Make the Base
- Add equal parts shaving cream and Elmer’s school glue to each compartment of your muffin tin. This becomes the base of the puffy paint!
Step 2: Add Some Color
- Mix in a few drops of food coloring to each compartment of the muffin tin. Stir the food coloring into the mixture until the color is evenly distributed and reaches your desired intensity.
Step 3: Create Your Masterpiece
- Now comes the fun part—painting! Use paintbrushes or small spatulas to apply your homemade puffy paint onto paper or cardboard. Experiment with different strokes and techniques to create texture and depth in your artwork. The puffy paint will deflate slightly as it dries, but will still leave a three-dimensional look to your creations.
Step 4: Let It Dry
- Allow your artwork to dry completely. The drying time will depend on how thickly you applied the puffy paint and the humidity in your environment. Be patient—the texture and vibrant colors will become more pronounced as it dries.
Step 5: Enjoy Your Artwork
- Once your puffy paint artwork is dry, display it proudly! These textured paintings are perfect for framing and hanging on the wall, giving your space a splash of color and creativity. You can also use them to create greeting cards, decorate notebooks, or as personalized gifts for friends and family.


Agnes Hsu is a mom of three and has been inspiring parents and kids to get creative with easy activities and family friendly recipes for over 10 years. She shares her love for creative play and kids food to her 2MM+ followers online. Agnes' commitment to playful learning and kindness has not only raised funds for charity but also earned features in prestigious nationwide publications.