
Follow us on Instagram for more fun ideas for kids!
By using this site, you agree to our Terms of Use. This post may contain affiliate links. Read our disclosure policy. As an Amazon Influencer, I earn from qualifying purchases.
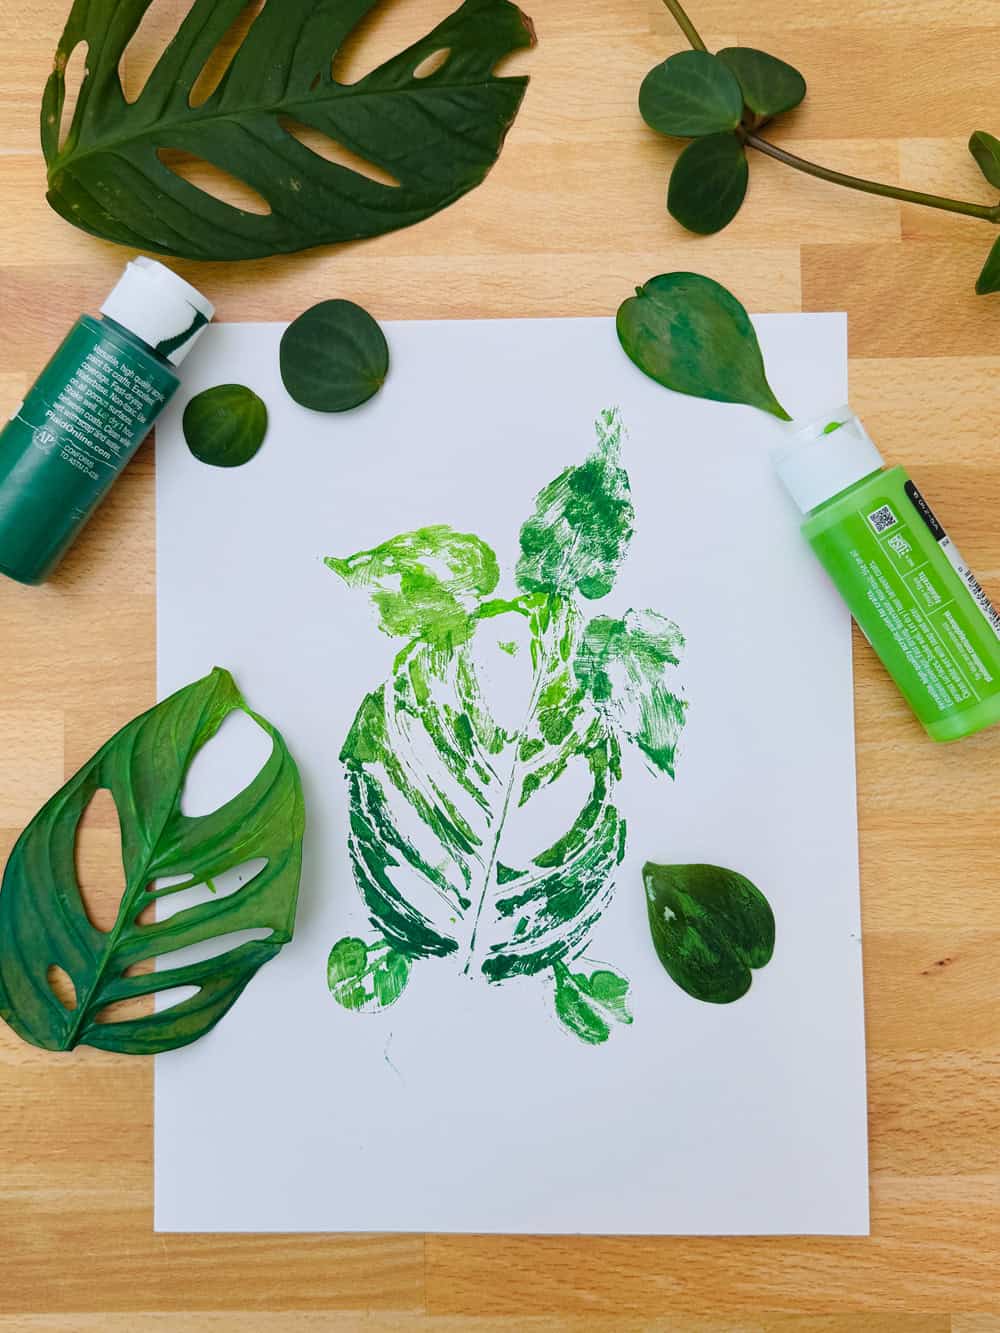
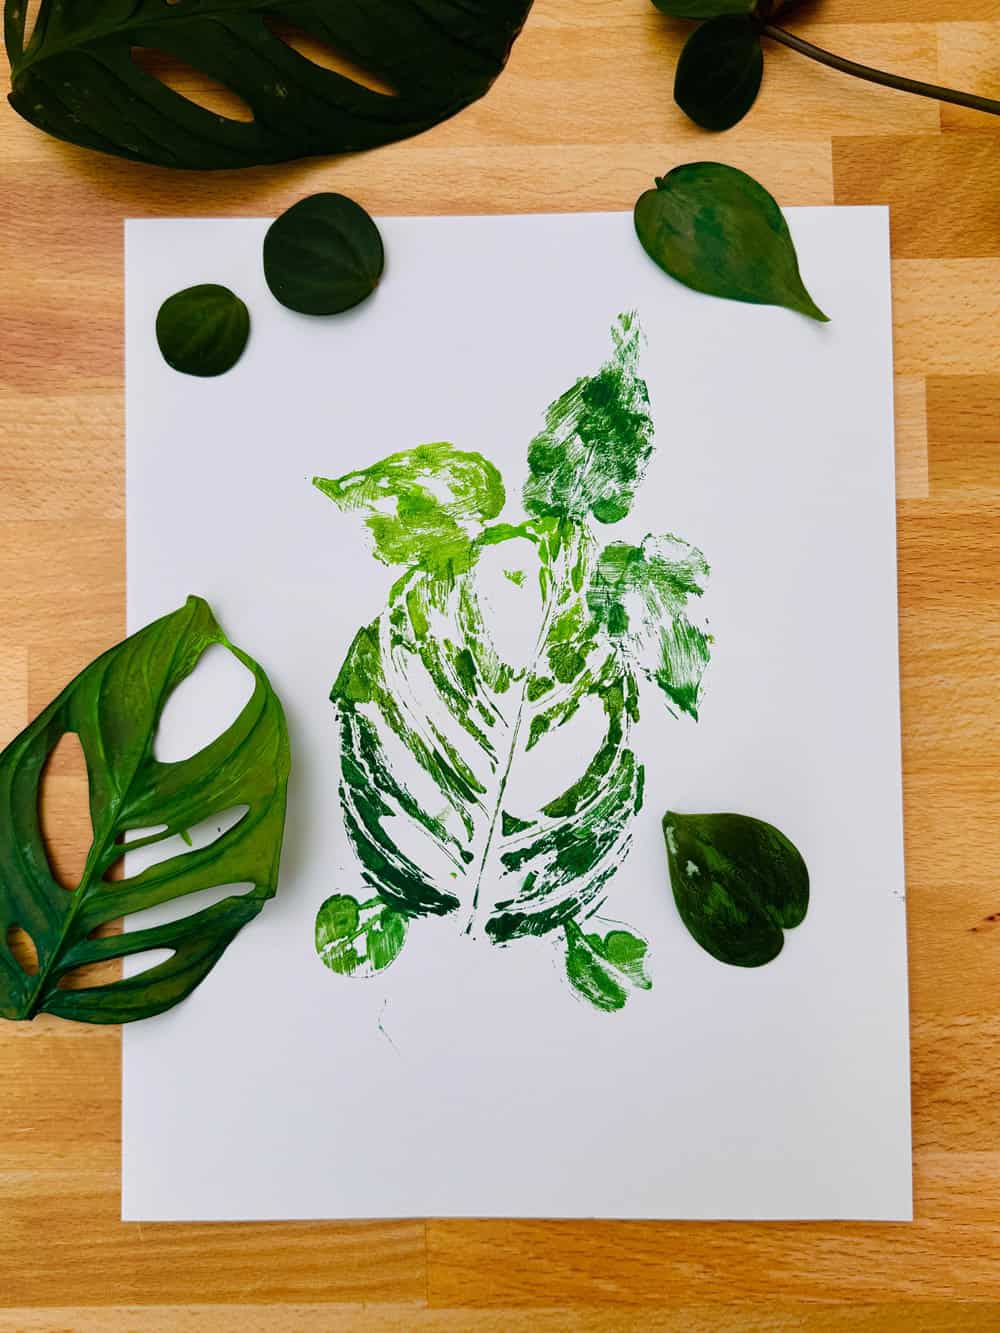
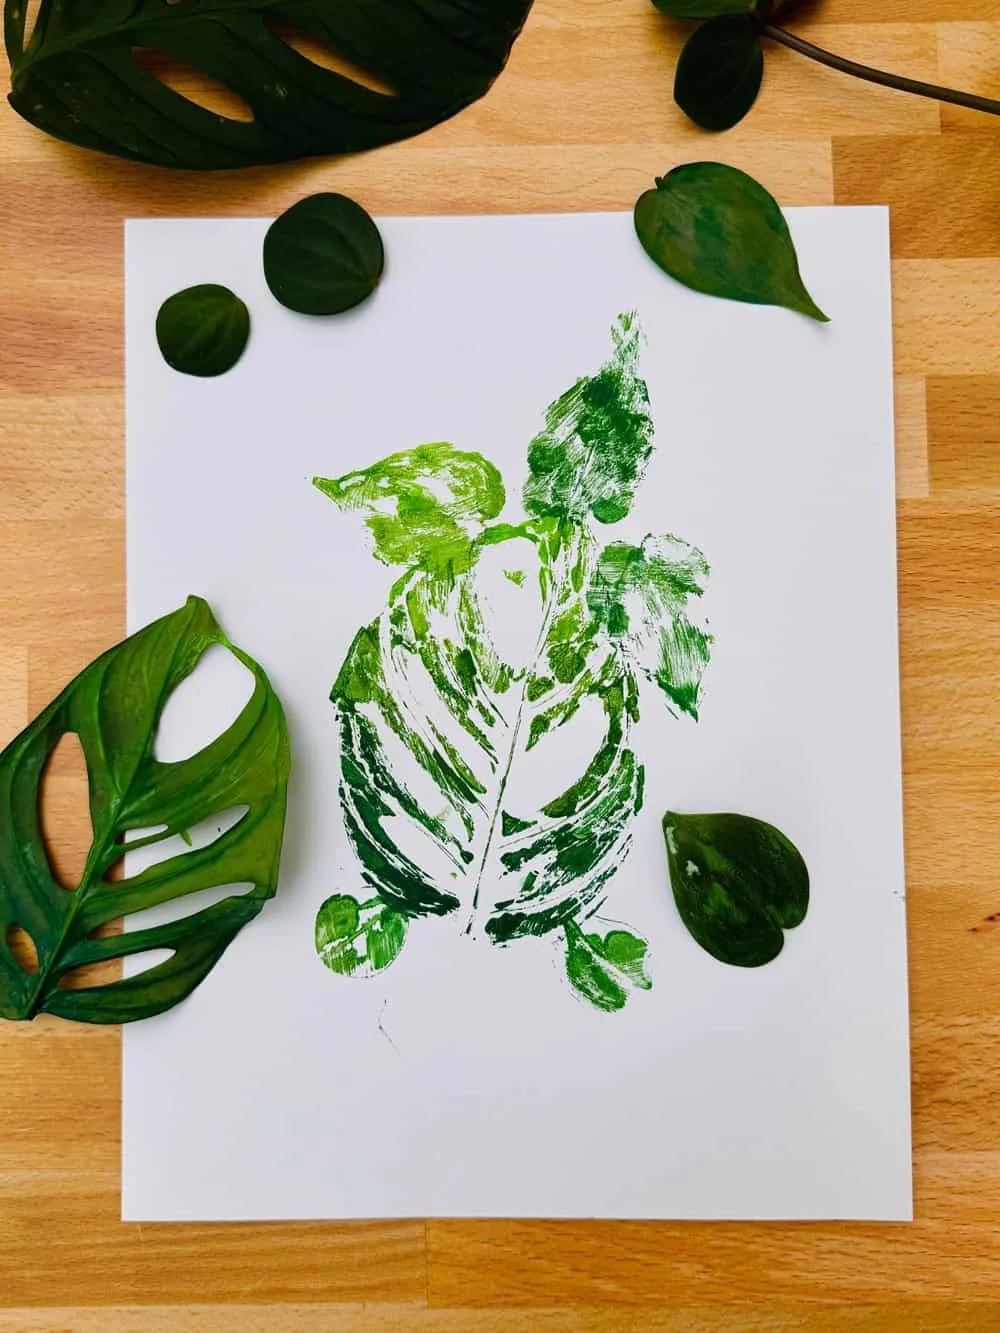
Use leaves and paint to create an adorable leaf turtle for a beautiful nature art project with kids.
If you’re looking for a simple, fun, and creative craft to make with kids, painted leaves are one of our favorite art projects! We’ve made painted leaf butterflies, leaf fish and now…a painted leaf turtle! We love painting with leaves because all you need are leaves and paint to create beautiful nature masterpieces! No two leaf paintings are alike so kids will love admiring their unique, and one-of-a-kind art.

Painted Leaf Turtle – Materials:
- A variety of leaves in different shapes and sizes (for the turtle’s body, head, and feet)
- Green paint (we like to mix 3 kinds of green paint for an ombre effect!) We used acrylic paint.
- A paintbrush or sponge brush
- White cardstock
- Newspaper or old cloth (to protect your work surface)
How to paint a turtle leaf craft
- Gather Your Leaves: Start by going on a nature walk to collect some leaves. Look for leaves that have interesting shapes and textures. For the turtle’s shell, a large leaf with a rounded shape and holes, like a monster works great. Smaller leaves can be used for the head, legs, and tail.
- Prepare Your Workspace: Lay down some newspaper or an old cloth to protect your workspace from any paint spills.
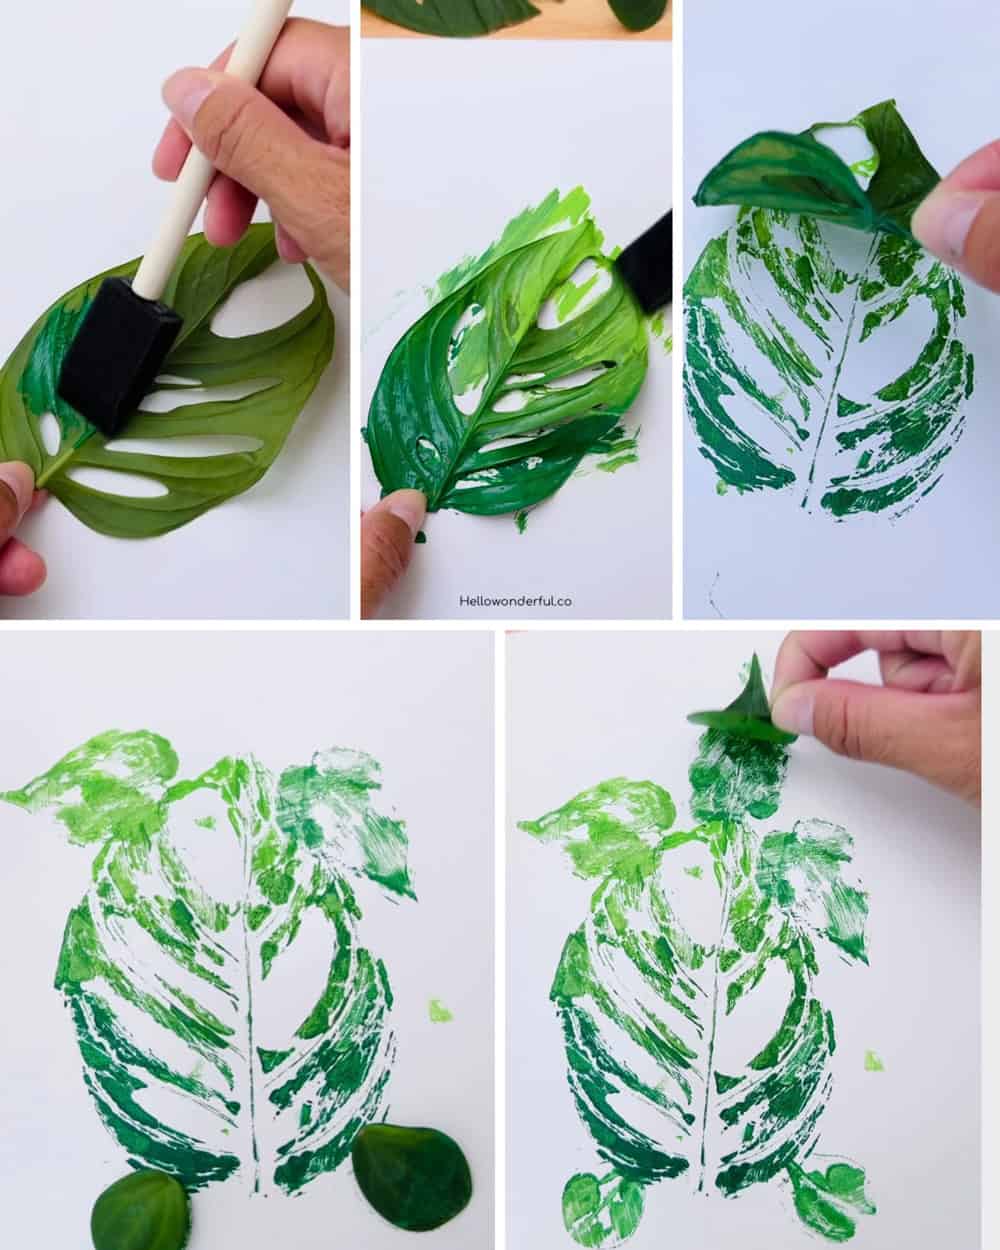
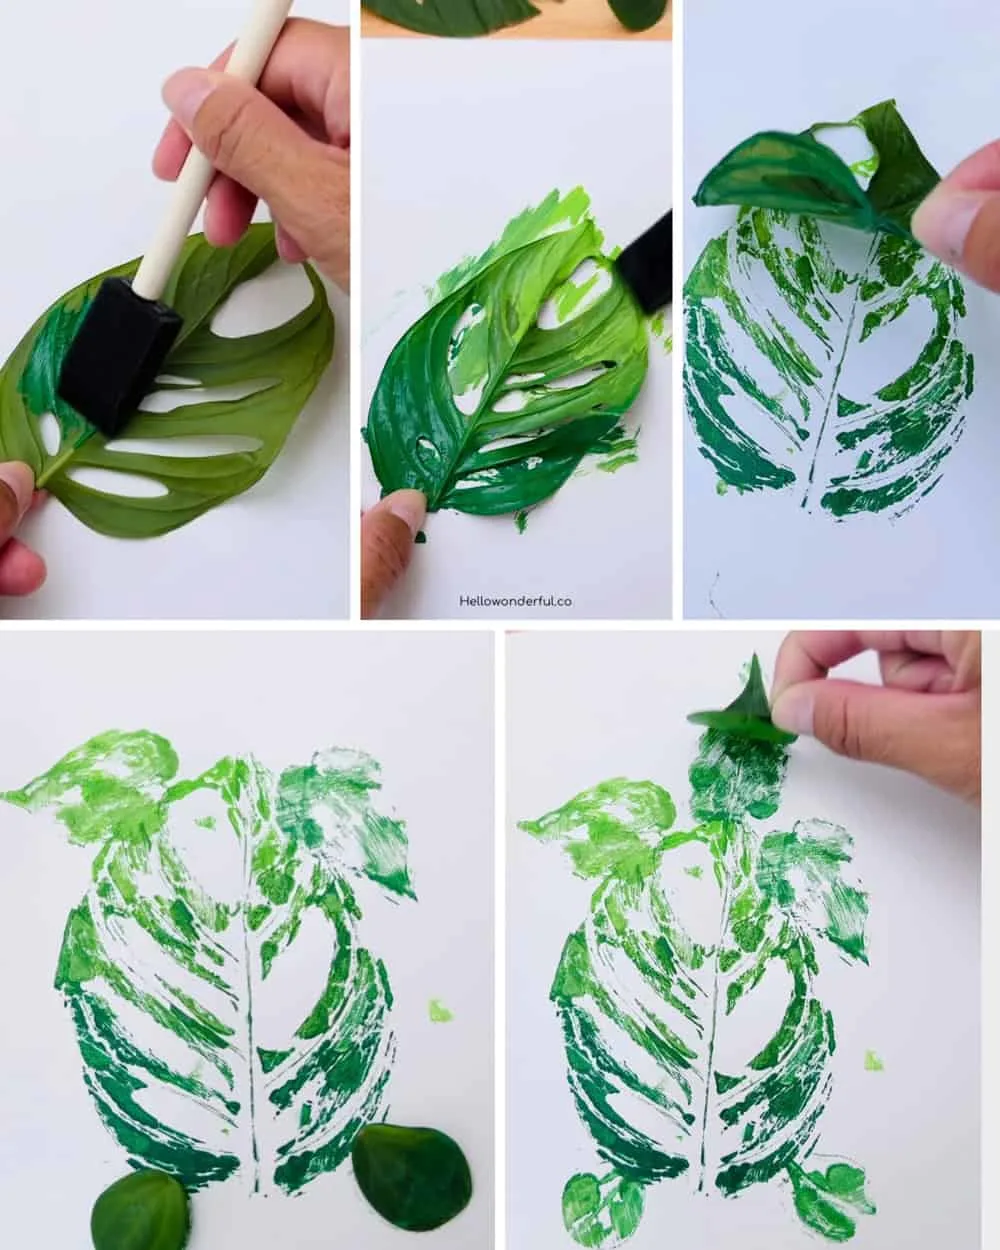
- Paint the Leaves: Once you’ve gathered your leaves, it’s time to start painting. Dip your paintbrush or sponge brush into the green paint and apply an even coat onto the underside of the leaves. The underside often has more pronounced veins, creating interesting patterns.
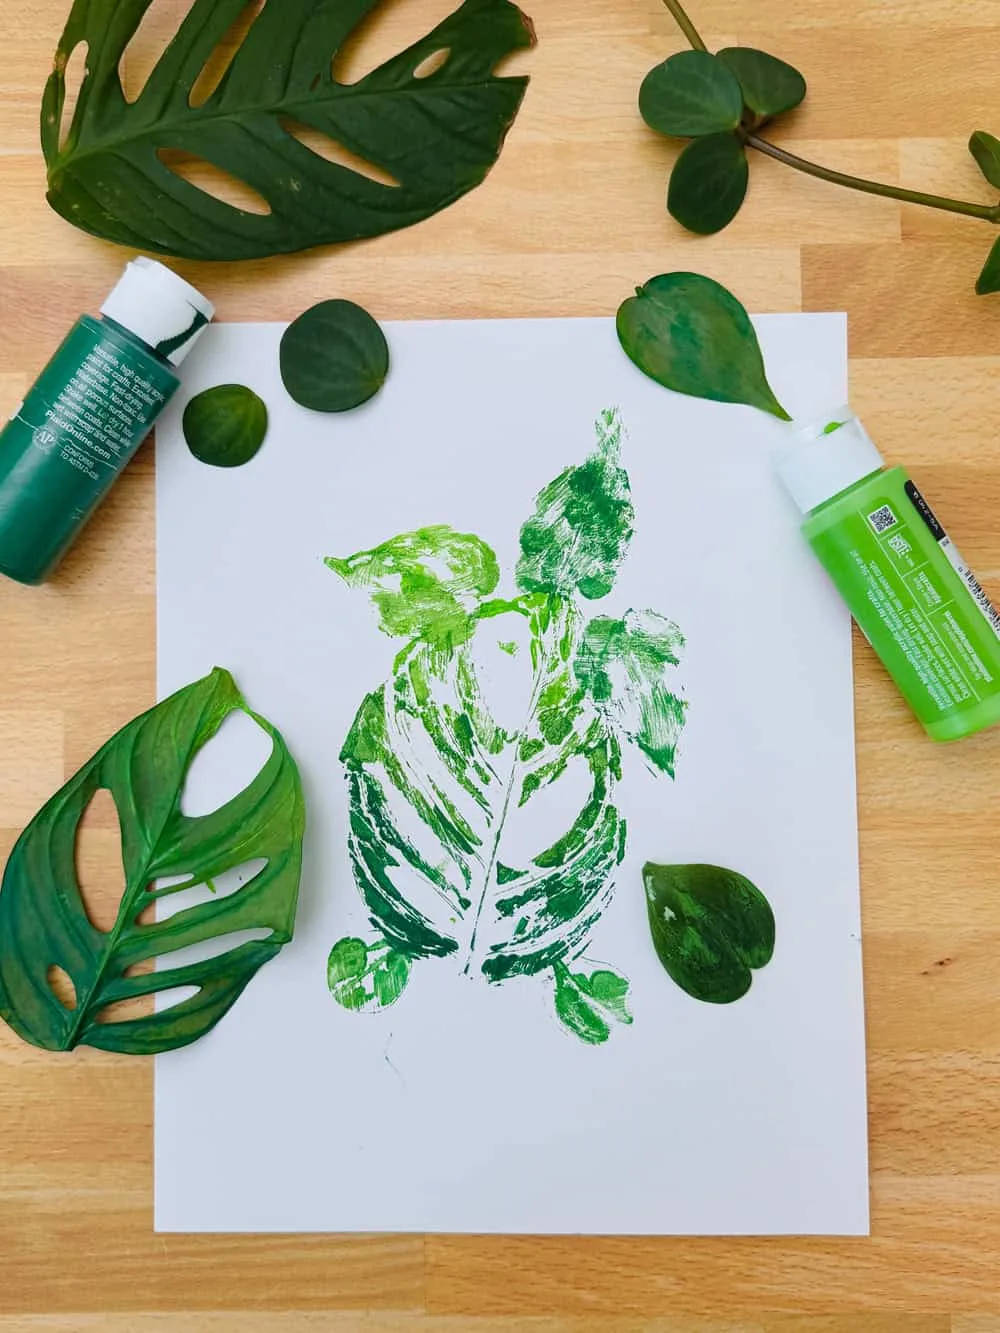
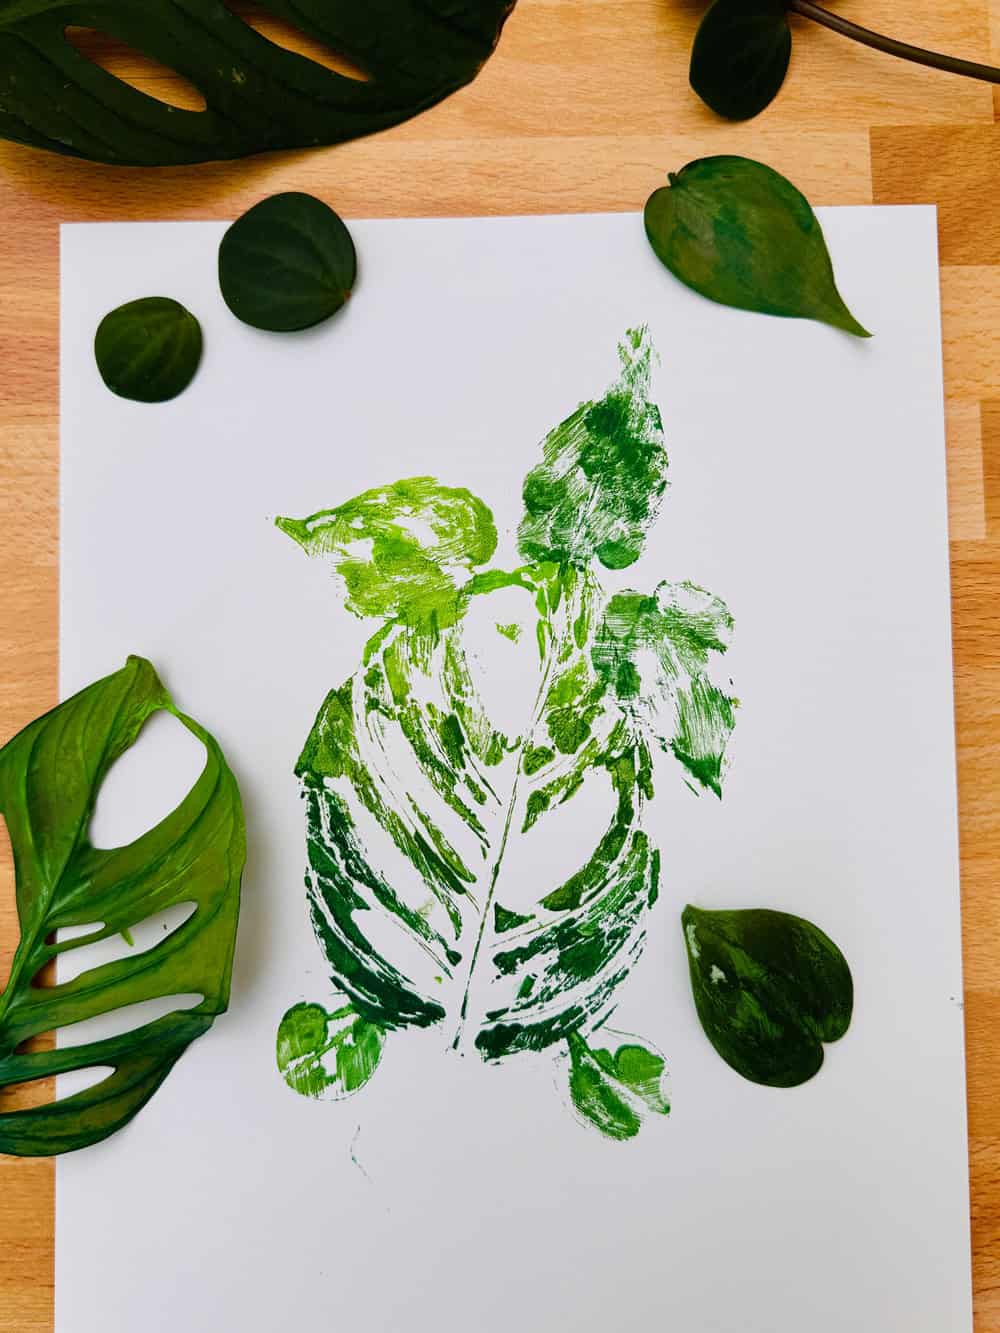
- Stamp the Leaves: Now comes the fun part! Gently press each painted leaf onto your paper or canvas, starting with the largest leaf for the turtle’s shell. Be sure to press down firmly and evenly to transfer the paint. Lift the leaf carefully to reveal the print. Use smaller leaves to add the turtle’s head, legs, and tail.
- Add Details (optional). Although we opted to leave our turtle plain, you can add additional details with a black marker like a mouth or eyes. Or even a background like water or grass to complete a scene.
Leaf Painting Variations:
- Experiment with Colors: While green is the traditional color for turtles, feel free to experiment with other colors to create a more whimsical look.
- Layering: Try layering different leaves to create a more textured turtle shell.
- Try Different Shapes: Don’t be afraid to use leaves of various shapes and sizes. Each one will give your turtle a unique look.
Final Thoughts
This painted leaf turtle project is not only a great way to encourage kids to explore nature, but it also allows them to express their creativity. The best part? No two turtles will look the same, making each one a unique masterpiece. Happy crafting!


Agnes Hsu is a mom of three and has been inspiring parents and kids to get creative with easy activities and family friendly recipes for over 10 years. She shares her love for creative play and kids food to her 2MM+ followers online. Agnes' commitment to playful learning and kindness has not only raised funds for charity but also earned features in prestigious nationwide publications.