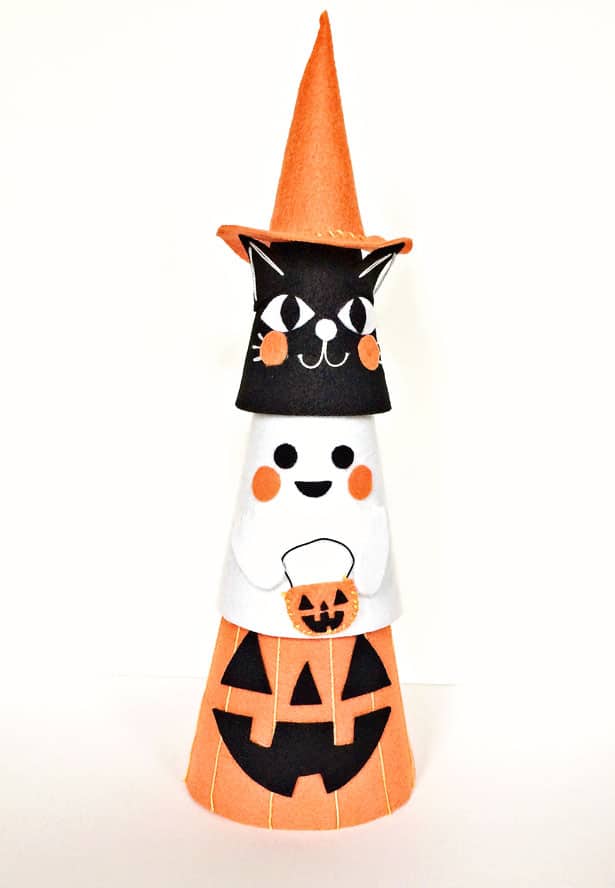
I was asked by Chad Boender of Male Kindergarten Teacher and Laura Kelly Walters of Me and My Inklings to participate in a campaign for Kunin Felt. They sent several artists, crafters and bloggers a box of felt and various other goodies. We had to come up with something wicked cool to post and share with the crafting world. So I naturally chose Halloween since it’s right around the corner. Follow the instructions below to make these cute Halloween Cone Friends!
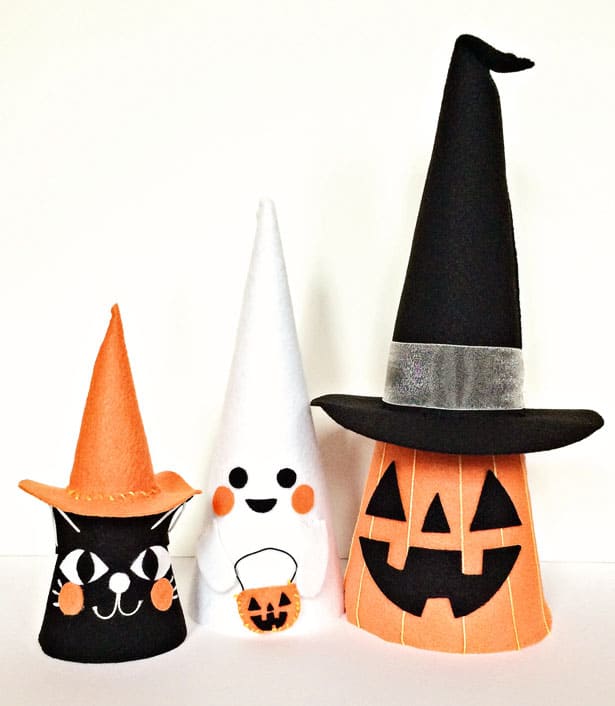 Halloween Cone Friends – Materials:
– Papier mâché or styrofoam cones in various sizes
– Felt
– Pencil/white colored pencil
– Fabric scissors
– Fabric glue/fabric spray glue
– Embroidery floss
– Embroidery needle
– Hot glue
– Paper cake plate
Step 1. For the large jack-o-lantern I first began by making a small mark with a pencil on the inside of the cone. Then I laid the cone on a piece of orange felt, I traced one side of the cone and then began to roll the cone carefully tracing the bottom as I went. The mark will indicate that you’ve rolled the cone one full rotation. Once I had my pattern I cut it out using the fabric scissors. It’ll look like a triangle with a rounded bottom edge.
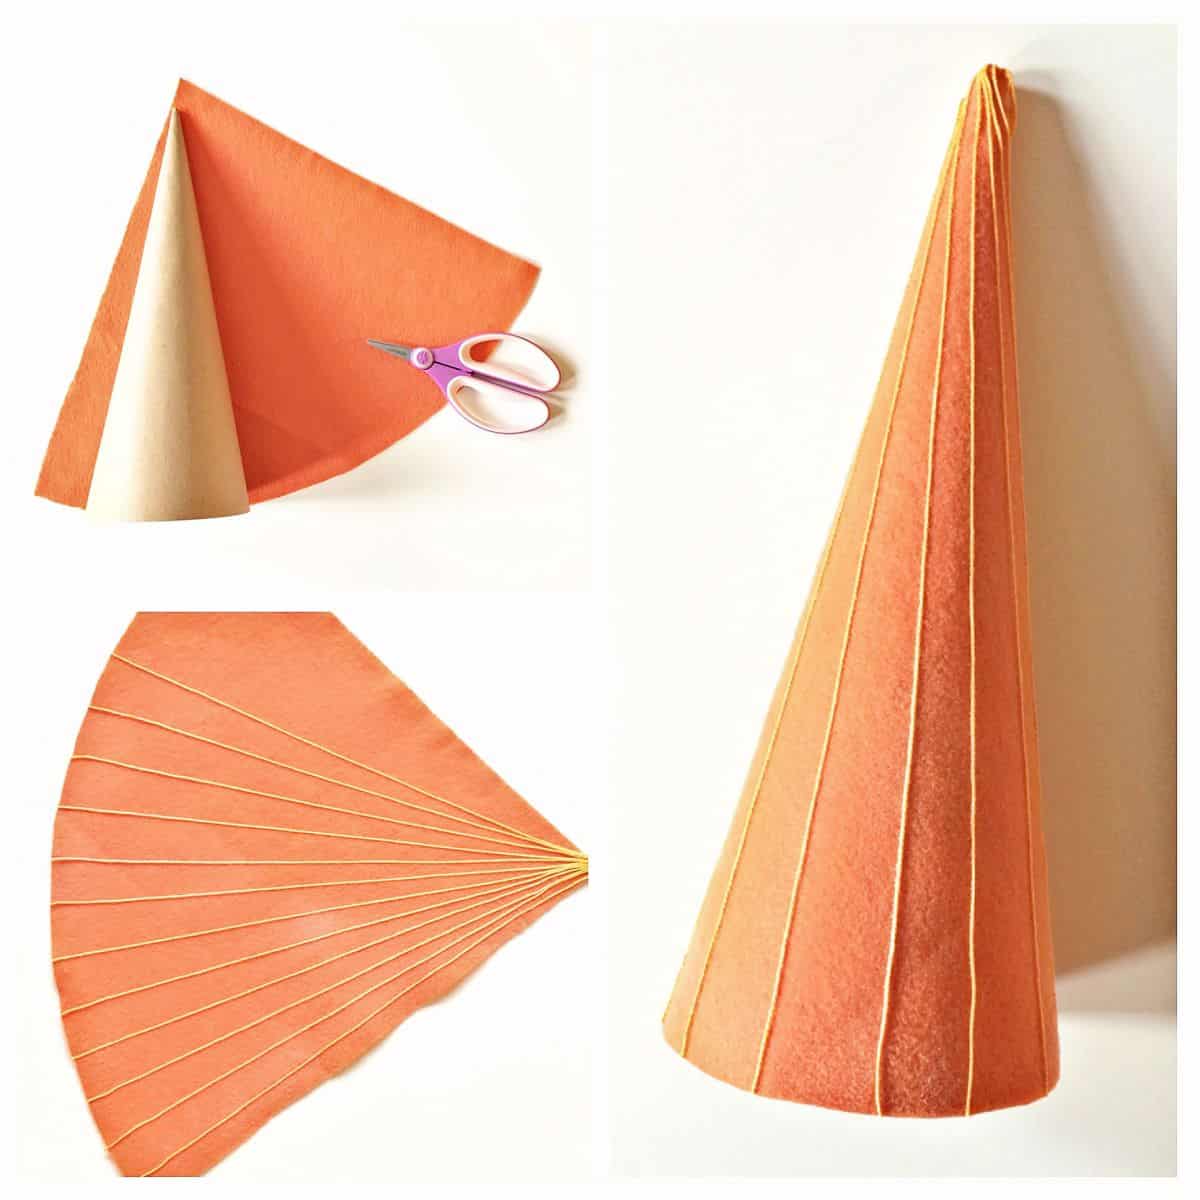 Step 2. I then cut strips of yellowish orange embroidery floss the length of the cone and sprayed them with a fabric spray glue, then I pressed them on the felt and let them dry a bit. The spray glue directions also told me to iron them on. Next I cut the face out of black felt. Use the internet for reference for a jack-o-lantern face, I referenced some cute decorations I saw at Target his year. Once everything was in place I hot glued it onto the cone.
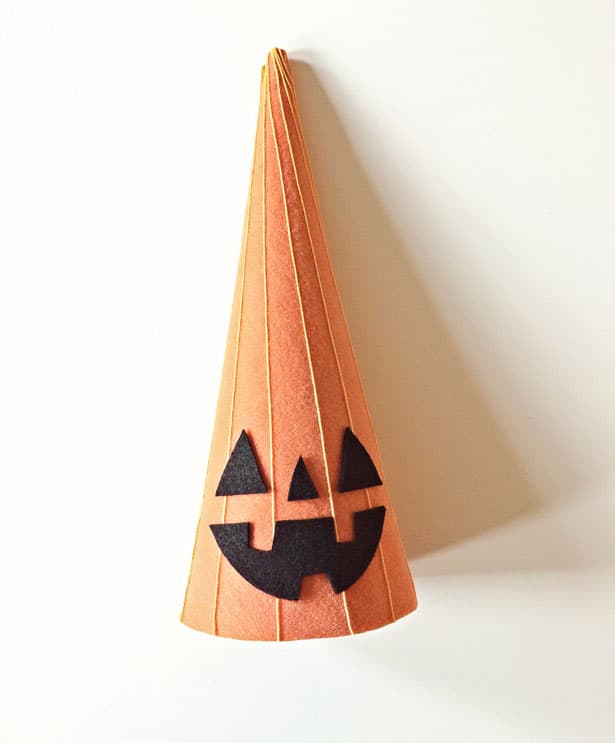 Step 3. For the jack-o-lantern’s hat, I traced the middle sized cone and made a cone pattern from black felt just like the jack-o-lantern pattern. I then used a paper cake plate to trace a circle and the bottom of the middle cone to create the brim of the hat. Next I stitched the cone and the brim together using embroidery floss.
.jpg) Step 4. For the ghost I simply cut out various shapes to create the face and adhered them with hot glue. The arms were stitched on at the top, and his trick or treat bag was two pieces of felt stitched together.
Step 4. For the ghost I simply cut out various shapes to create the face and adhered them with hot glue. The arms were stitched on at the top, and his trick or treat bag was two pieces of felt stitched together.
Step 5. For the cat I once again just cut out various shapes to create the face and used embroidery floss for details.
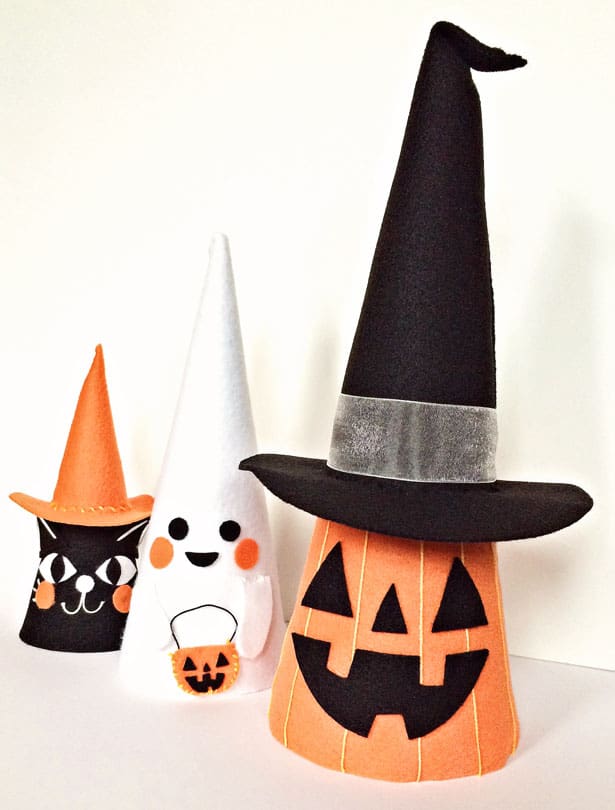
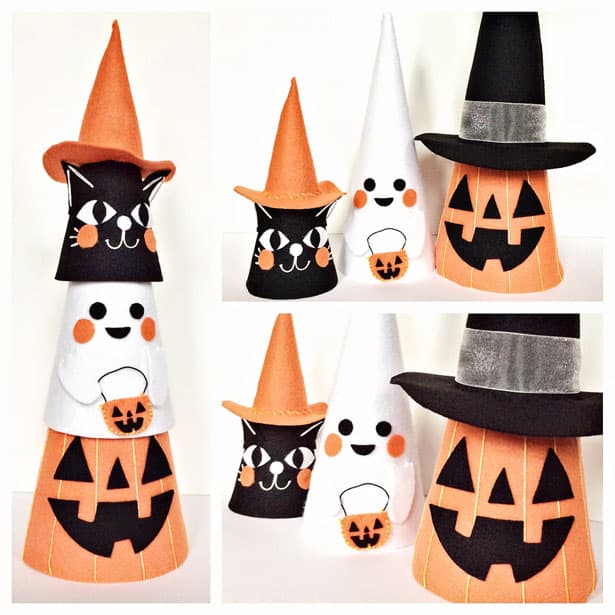
These make cute Halloween decorations for the home that kids will love playing with!
What are your favorite Halloween crafts for kids?
I was provided felt from Kunin for this project. All opinions and text are my own
.jpg)
John Lavelle is an artist and art teacher who loves working with all things paper – cardstock, cardboard, foam board, tissue paper, and of course toilet paper tubes. John graduated from the School of Visual Arts with a Bachelors degree in cartooning and earned his Masters degree in Art Education.
Over the past few years, John has been working with young individuals who have ASD, which constantly keeps him on his toes and who are the inspiration behind the creative projects he prepares for their daily art classes. You can follow his latest projects on Instagram.
Agnes Hsu is a mom of three and has been inspiring parents and kids to get creative with easy activities and family friendly recipes for over 10 years. She shares her love for creative play and kids food to her 2MM+ followers online. Agnes' commitment to playful learning and kindness has not only raised funds for charity but also earned features in prestigious nationwide publications.

